As you know, our barn project was recently completed, but unfortunately that doesn’t mean we are done in here yet! Now we turn our focus to finding all these items and tools homes inside their new shiny cabinets! Below I’ve listed some things I have found handy when it comes to organizing tools.
This can hold up to 180 batteries of various sizes. I was skeptical at first but after using it-I love it! The carrying case makes everything very convienant, and the case also comes equipped with a battery tester.
I found a lot of my pegboard accessories at a local garage/estate sale, then spray painted them gold to match. But these accessories are wonderful for a variety that allows flexible storage options. We hang our hammers, levels, screwdrivers…etc… on our peg wall.
I love this little label maker. It was competetively priced and utilizes an app to print off not only letters, but borders and clip-art to maximize personalization.
The storge containers we used have been discontiued, but I love the idea of a clear bin to be able to easily see what is inside each one! These 30L containers will also fit great on any 12″ tall shelf.
We store all our basic nails and screws inside these. They have customizable compartments and the latch/handle makes moving them from one location to the next is extremely useful.
There are some places that just turn into a “catch-all” mess. You know what types of places I’m talking about: those spots around your home that always end up as cluttered messes that no one makes time to organize. For you, it could be a closet, or a drawer. For us: our storage barn. It’s embarrassing how bad this space got, but I can tell you it wasn’t intentional. We never imagined that we would be using this barn for this long, and as the project to-do (and project completed) lists grew, so did the mess. We never made the time to fix the problem: until now. I am so excited to be able to take you on the journey that transformed our space, and let’s be honest, I’m so happy that it doesn’t take 15 minutes to find anything in here any more!
From the beginning, we knew we needed function. Previously we used a hodgepodge of old shelving units left here by last owners, but these shelves never provided us the true function and accessibility we desired. So I turned to the idea of installing cabinetry. I explored the option of buying pre-made cabinets from our hardware store, but I couldn’t find any with the dimensions of drawers I wanted, and couldn’t rationalize the cost for something that I didn’t love. And that is how I decided to build my own. I have never built any cabinets before, and I was honestly a little nervous about taking on such a large and overwhelming task, but thankfully, YouTuber Brad Rodriguez with Fix This Build That has amazing video tutorials that helped us conquer this large-scale project.
Along with our cabinets, we gave everything a new coat of paint, built a countertop, installed peg board, peg board hooks/accessories, shelving, lighting, and new flooring. (Ceiling: SW Iron Ore; Cabinets: SW Vogue Green; Peg Board: SW Pediment). You can learn more about that in my post: From Beast to Beauty-Our Transformed Barn Workshop.
If you are willing to spend the time, building your own cabinets can be cost-effective and more beneficial to your space/needs given the ability to customize them. I am not claiming to be a professional, quite the opposite as building drawers proved to be extremely difficult for us, and I would prefer to not ever do it again. But here are the materials, tools, and basic steps that can help you determine if building your own cabinets will be right for you.
I followed a YouTube video tutorial by Brad Rodriguez with Fix This Build That to learn how to build my cabinet bases with drawers. He also has building plans (complete with measurements and cut lists) available for purchase, but I decided to “wing-it” after watching his video about 20 times over. Here’s the basics:
Cabinets with Drawers:
Build base carcasses (frame)
Cut down all your sheets to measurements prior to assembly. This makes the process much simpler. You can have your material cut down at the hardware store you purchase from, or cut at home yourself using a table/hand saw.
Use the kreg jig (set to ¾” setting) to drill your holes. I used my PORTER CABLE impact drill with the kreg jig tip (set to ¾” setting).
Apply wood glue to the egged prior to securing with screws, this will give your carcass a more secure hold.
Ensure your carcass is square to avoid difficulties in later assembly
Attach your ¼ ” plywood to the back with screws (or a brad nailer)
Build your drawers
Follow the steps in the video, and use a PORTER CABLE impact drill, kreg jig, and wood glue, to assemble the drawers, beginning with the frame.
Check to make sure your frame is square by measuring the diagonal distance between corners
Once you have made sure your frame is square, insert and secure the bottom of the drawer
Following the directions that come with your drawer slides, attach to the drawers and inside the cabinet carcass. (We purchased a drawer jig to help level the drawer slide mechanisms and I found that very useful.)
Finishing touches:
Level your cabinets and secure to the wall
Insert drawers
Attach drawer fronts
Using ½” MDF, use wood glue and clamps to attach drawer fronts
Secure with ½” screws, attaching from the inside (avoid poking the screws through the front for a seamless finish
Attach drawer handles
Cabinets with Shelves:
Build base carcasses (frame)
Cut down all your sheets to measurements prior to assembly. This makes the process much simpler. You can have your material cut down at the hardware store you purchase from, or cut at home yourself using a table/hand saw.
Use the kreg jig (set to ¾” setting) to drill your holes. I used my PORTER CABLE impact drill with the kreg jig tip (set to ¾” setting).
Apply wood glue to the egged prior to securing with screws, this will give your carcass a more secure hold.
Ensure your carcass is square to avoid difficulties in later assembly
Attach your ¼ ” plywood to the back with screws (or a brad nailer)
Attach shelves
Mark and level the height you want your shelves to sit, the attach with kreg jig holes and wood glue
Secure shelving unit to the wall by drilling screws into studs
Build Cabinet doors
Using ½” MDF and cut to door width
Attach hinges and hang cabinet doors
If screws poke through, you can use ½” MDF and a brad nailer to create a “frame” for your doors and hide any screw holes.
Prime, paint, and enjoy all your new storage!
Lessons Learned
Building cabinets can be tough, and drawers are finicky if you haven’t built any before; be patient with yourself and give yourself room to learn.
Use ¾” MDF board. We accidentally picked up ½” MDF for parts of this project and it really made kreg-jigging difficult because the screws would blow through the MDF.
SQUARE YOUR DRAWERS. SQUARE THEM. Click HERE to learn how.
Get at least a “mid-grade” kreg jig like this one if you are planning on making cabinets. The basic model is frustrating to use when making so many holes.
Have fun with it, and know that you are capable of doing difficult things!
There are some places that just turn into a “catch-all” mess. You know what types of places I’m talking about: those spots around your home that always end up as cluttered messes that no one makes time to organize. For you, it could be a closet, or a drawer. For us: our storage barn. It’s embarrassing how bad this space got, but I can tell you it wasn’t intentional. We never imagined that we would be using this barn for this long, and as the project to-do (and project completed) lists grew, so did the mess. We never made the time to fix the problem: until now. I am so excited to be able to take you on the journey that transformed our space, and let’s be honest, I’m so happy that it doesn’t take 15 minutes to find anything in here any more!
If you want more information on how I built my cabinets, please click HERE: How I Built Our Beautiful Barn Workshop Cabinets. That post highlights the ins-and outs of the cabinet building process, as well as has hyperlinks to how-to videos that I followed to build our cabinetry.
This post will highlight everything else we did to transform this clutterd, unsightly space. Below you will find links to products used, more detail on finishing touches, and a bit more information about how I transformed my floor using paint!
Overall changes and additions made:
What exaclty all went into this space over the past month?:
Originally I was going to use left-over laminate flooring from our little house renovations, but after seeing it against everything in the barn I decided to paint the floor instead. I used a similar method that Liz Galvan used in her Garden Greenhouse Floor Painting. I absolutely adored the look and decied to use the same colors we had on hand: SW Iron Ore and SW Pediment to tie the whole look together. Our tape ended up pulling up some of the paint, but honestly this only made me love it more, and I only hope you love it as much as I do. I will be using a clear sealant to protect these and make cleaning easier in the future.
I’m so excited to have this space in some form of order, and cannot wait to start getting our tools into thier new “home”.
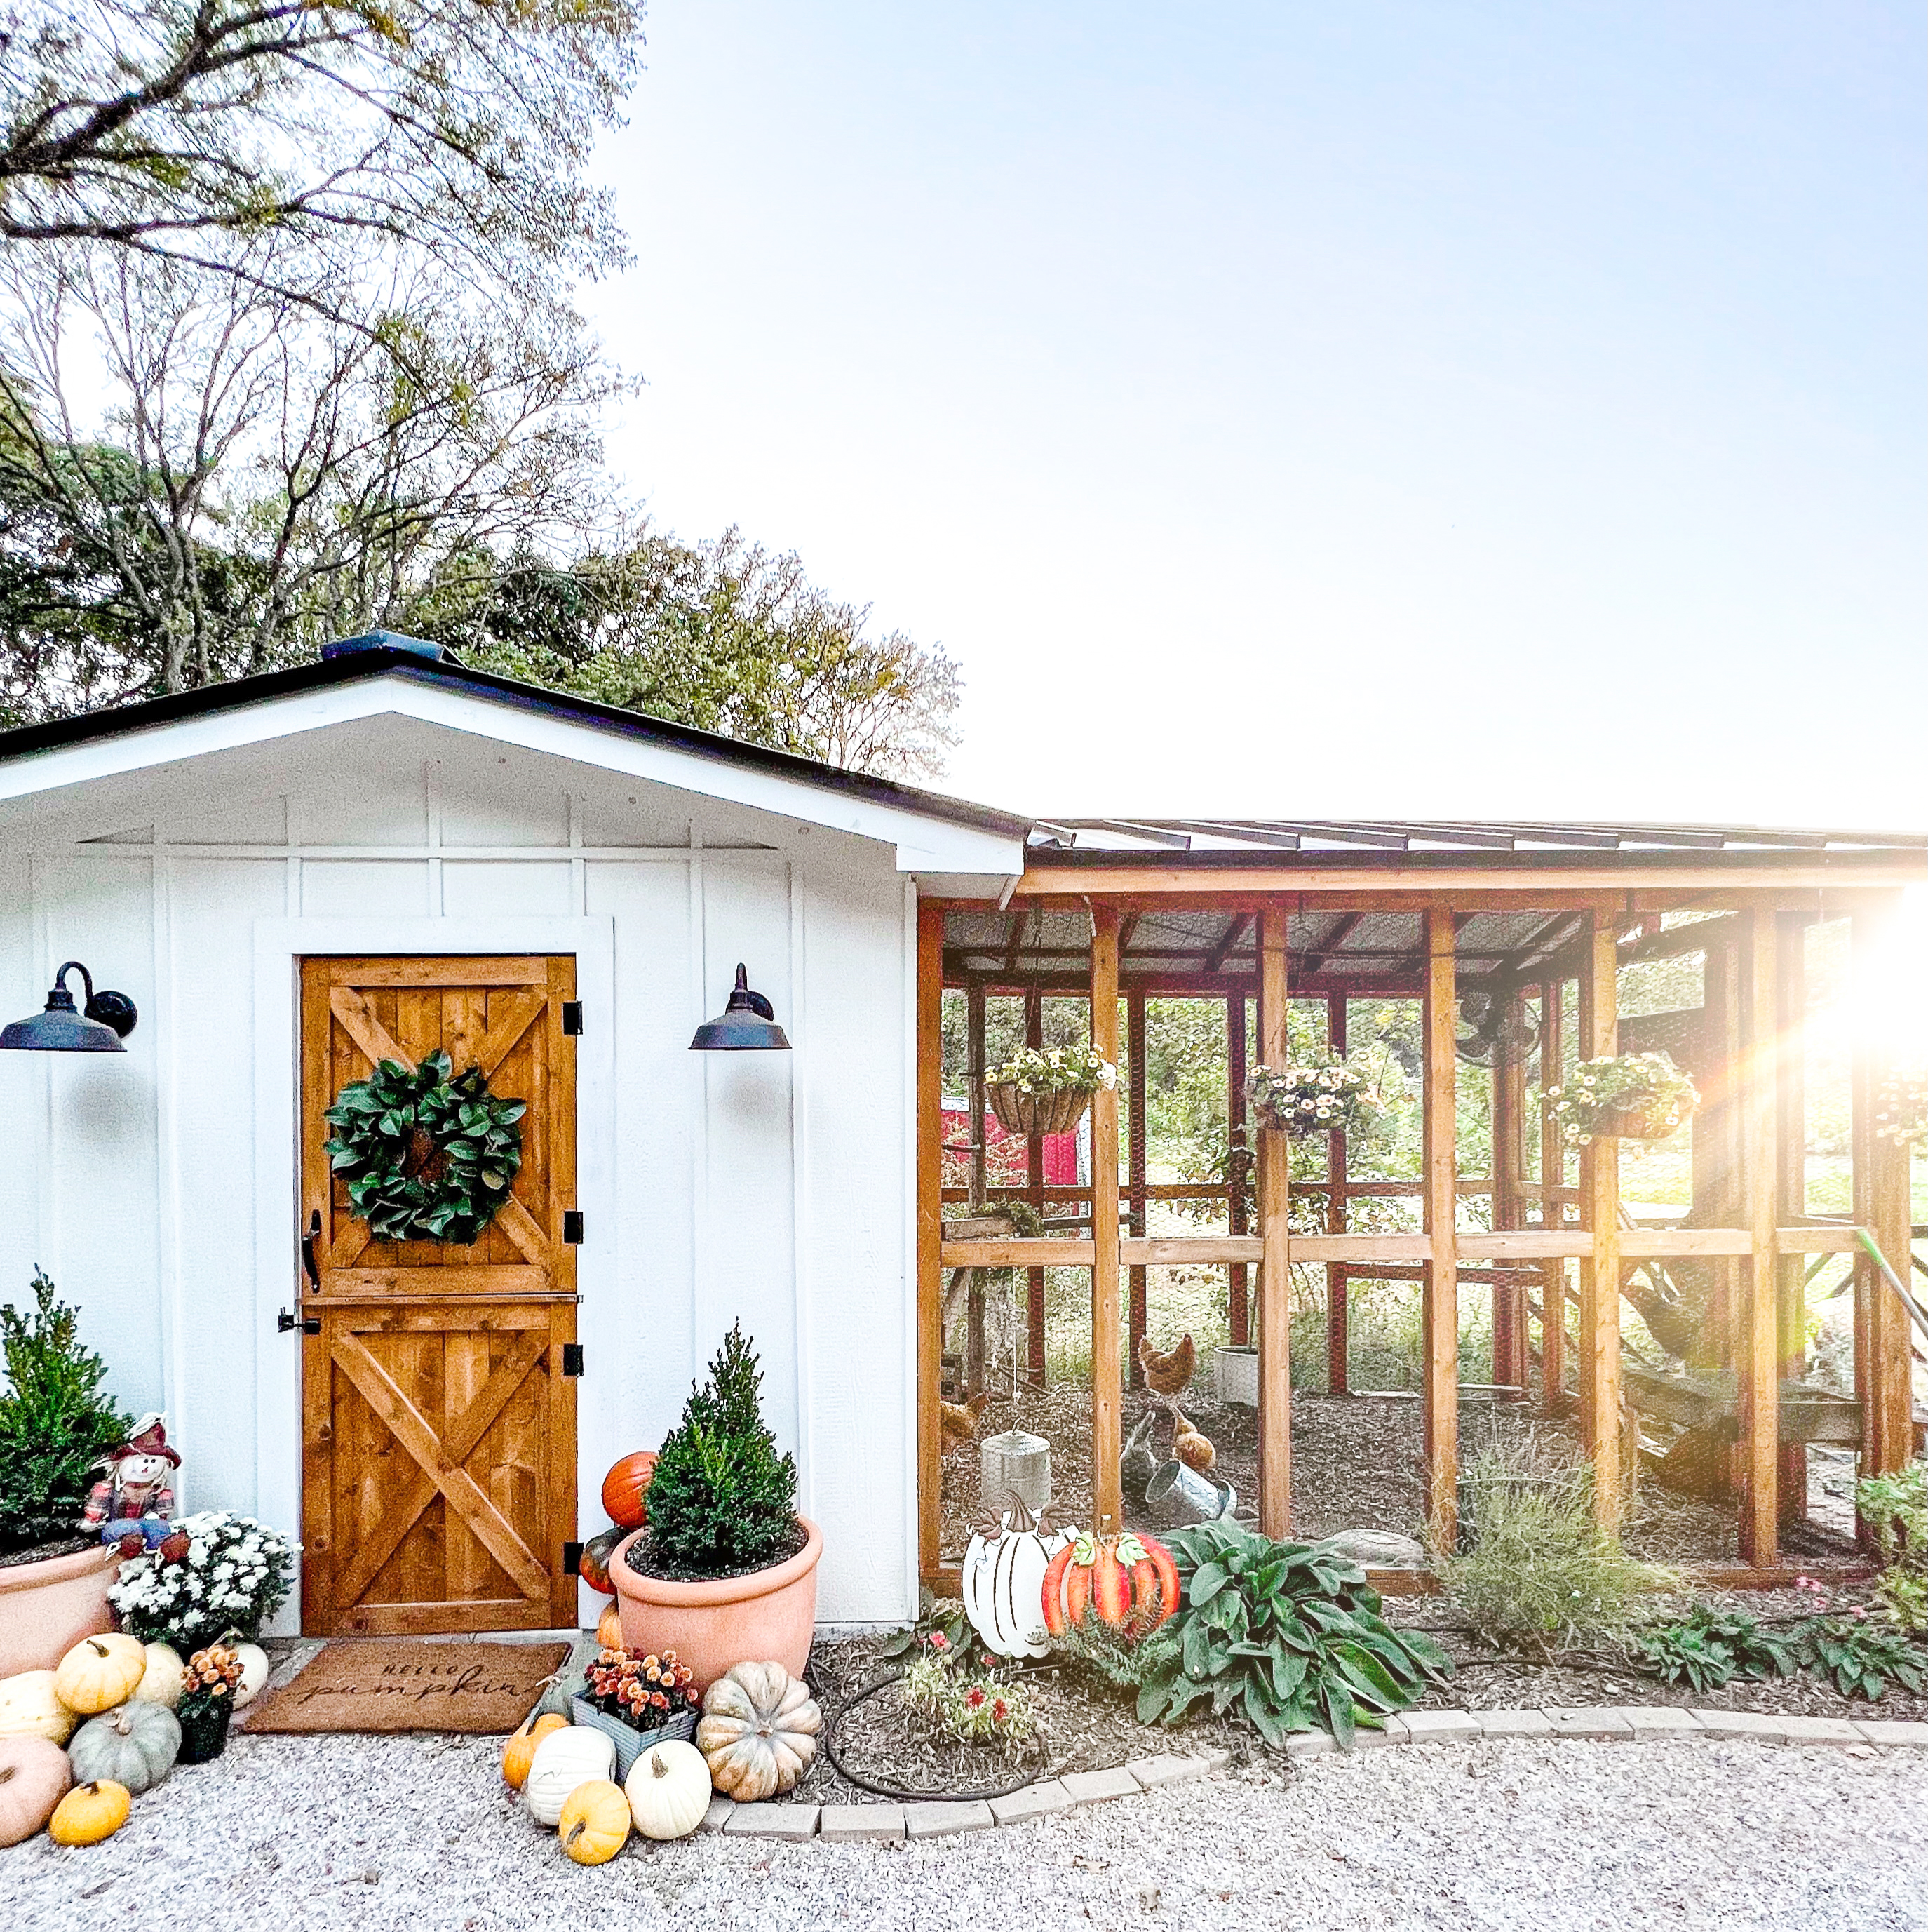
I currently do not have plans for sale on our coop. We modified purchased plans from Twelve On Main and as of right now I still point to Sara’s plans if you are looking to build a coop design similar to ours.
“What are the dimensions of your coop/run?“
The enclosed coop is divided into two parts: one for the chickens and one for storage. The entire area inside the coop is 10’x10′. The enclosed run is 12’x8′.
“How much did the coop cost to build?“
We did not keep perfect records of the receipts for the coop-bad practice on our side. But, after tallying it up we roughly spent $6000 on our coop, (give or take) not including any decorative lighting or electrical runs. We saved on a lot of costs by doing a majority of the labor ourselves, and most of the cost came from our cement base and the standing seam metal roof.
“What does maintenance look like?“
Personally, I think chickens are extremely low maintenance as long as you are able to keep their coop clean of dampness, most bacteria or fumes won’t accumulate. While everyone’s cleaning schedule will vary based on flock needs-you can find a more detailed outline of my cleaning schedule HERE!
Why chicken wire and not hardware cloth?
My chicken wire is extremely sentimental to me: it was on the chicken barns of my family farm. My father and grandfather were commercial chicken farmers; and when my father passed, my sister and I decided to liquidate the barns. I salvaged the rolls of wire from the debris and to me, it feels like a piece of home.
If you have large predators, yes hardware cloth will be a more secure option. We do not have large predators and I have found that on the rare occasion we have had a snake (once) they prefer to enter through the open chicken door.
Thompson WaterSeal Timberoil in Transparent Teak. This is a waterproofing seal that is used on outdoor decks and fencing for maximum protection on our run.
“What color is on the exterior of the coop?“
SW Pure White
“What type of roofing material did you use?“
Our roof is a black standing seam roof that we hired out to be installed.
“What “bedding” do you use inside the coop?“
I use a variation of the deep litter method with sand and pine shavings
“What “bedding” do you use in the run?“
We use untreated wood mulch and it is amazing. Highly recommend it because the poop will filter down underneath and compost itself pretty easily.
“How many nesting boxes do you have?“
A: We have 6 total, but they really only use 4.
“Where did you find your light fixtures-are they hardwired?”
Our exterior lights are the Arnette Outdoor lights (similar item linked here) from Lamps Plus and are hard-wired and set up on a smart system that connects to my phone.
What are your favorite coop features?
I absolutely love our coop, so it is hard to pick just one! My personal favorite features are:
the walk-in ability for easy cleaning
cement floors (easy cleaning)
storage space
electricity for lights and fan
easy access to nesting boxes
AUTO CHICKEN DOOR
If you had to change/add anything, what would you do differently?
One of my biggest regrets was not finishing the ceiling-which I recently completed. My hens would roost in the rafters and poo into the storage side-making it difficult to touch anything without getting flakey poo on myself. That problem is now solved!
If I had to “change” anything, I would have made the run even larger. But now that we have the lama crew, my chickens are safe to free-range with added protection.
I began my gardening journey like everyone else does: scouring the internet for the “best” soil recipe. And I stumbled upon Mel’s Mix.
Here’s what Mel’s Mix™ does for you and your garden that amended native soil has no chance of doing:
It conserves water. You want your plants to have just the amount of water they need — no more, no less. And Mel’s Mix™ does an amazing job at both retaining valuable moisture while allowing for excellent drainage so your plants don’t rot.
It precisely feeds your plants. The addition of blended compost means that your plants get the nutrition they need without having to mix, measure and add fertilizers.
It requires no digging or double-digging. Mel’s Mix™ ingredients create an unbelievably loose soil texture that allows plant roots to grow and expand, without the need to bust your ground up and dig, dig, dig. It’s easy from the beginning!
It takes the cumbersome science out of your gardening experience. Ever heard gardening friends who talk about soil pH and enzymes and such? Do your eyes start to cross and glaze over? We hear you. That’s why Mel’s Mix™ is so easy — the ingredients are perfectly balanced so there’s no need to get an advanced horticulture degree to understand if your growing conditions are right. With Mel’s Mix™, they are.
And let me tell you, this soil is perfectly fluffy and wonderful to work with. However, I have begun to vary the recipe just a bit depending on what I can find, and the expense of filling my Raised Garden Boxes.
So how much does it take to fill my 4′ x 6’x approx 24″ deep boxes? Here’s the math:
Roughly 48 cubic feet total:
24 cubic ft of garden soil (flower and vegetable garden soil)
8 cubic ft of compost (I mix some general compost and Black Cow Manure)
8 cubic ft of peat moss (Magestic Earth)
8 cubic ft of course vermiculite/ cotton burr compost
Add bits in at a time and mix until everything is evenly distrubuted! We bought most of our soil components at Lowes. While this soil mixture can be costly, you only need to buy in bulk once and then amend afterwards by season, so I think it’s worth it!
Welcome back to my garden informational series! If you are new, hello! I have been going over some FAQ and general information regarding our garden project. When we last spoke about the garden, I discussed our garden fence– If you’ve missed any previous post, feel free to click the links below to visit them and learn more about how we built up our garden so far!
I honestly love the journey that the decision to build up a garden has taken us on. I find so much peace and comfort in being able to tend to a brand new veggie sprout, and yet have learned so much from the loss of one too. Being in the garden is teaching me to be flexible, and I’m learning to roll with the punches, because even if a growing season goes perfectly, we aren’t guaranteed the same results next year, and I think that reflects a lot of life. I’m thankful for each lesson my growing garden has presented to me, and the ability I have to choose learn every day.
“A garden is a grand teacher. It teaches patience and careful watchfulness; it teaches industry and thrift; above all it teaches entire trust.”
Gertrude Jekyll
Last year, I built two raised garden beds to get my garden started (my first season being spring of 2021), but for the fall, I wanted to be able to experiement with more fall vegetables. So, I doubled our garden by adding in two more raised garden boxes, and I’m so happy with how much fuller the garden area is now. I’ve left some space to add more boxes later on, but right now I’m extremely happy with the four boxes I have. Scroll down for a material list and instructions.
Manageability: Raised beds offer a manageable way to garden a smaller space intensively.
Prevention of soil compaction and plant damage: One of the greatest advantages of raised beds comes from the protection the structure provides from foot traffic, especially from children working in a garden area. Since people work on the paths and don’t walk in well-designed raised beds, the soil does not get compacted and plants are less likely to be damaged.
Longer growing season: Raised beds warm up more quickly in the spring and drain better (assuming the soil is properly prepared), allowing for a longer growing season and better growing conditions. Particularly in the South, a properly prepared raised bed allows plant roots to breathe.
Less weeding and maintenance: Once the soil in a raised bed has stabilized, compaction is almost non-existent so the need for seasonal tilling is minimal. Weed populations decrease over time in a raised bed that is well cared for and mulched.
Better drainage: A well-prepared raised bed allows the soil to drain better than in an in-ground garden. In some areas of Georgia, the soil drains so poorly that raised beds enable gardening of crops that would not otherwise grow.
Easier soil amendments: A raised bed can enable crop growth in an area that otherwise would not support gardening. On steep slopes, raised beds can act as a form of terracing. Raised beds can be built on parking lots and other compacted, difficult-to-garden urban soils. For specific crops that thrive in particular soils, raised beds can be amended appropriately.
Material conservation: Because the gardening space is concentrated, the management of water, fertilizer, mulch and soil amendments can be more carefully controlled, leading to less waste.
Access for gardeners with disabilities: Raised beds, at the proper height, can improve access for wheelchairs, or for gardeners who have a hard time bending over.
Frequently Asked Questions:
What are the dimensions?
4′ X 6′ X 27.5″
Why so tall?
Because I like them tall!
What kind of lumber?
Whitewood
Does the stain affect the soil?
Nope! My beds are lined, therefore the stain never comes in contact with the soil
Why line your beds?
Adding a liner protects my wood from water damage, adds insulation, and helps retain moisture!
Are they filled from the bottom?
Nope! There is a wire “hammock” about 12″ from the ground to reduce the amount of soil it takes to fill these.
What color stain did you use?
I used Thompson WaterSeal in Transparent Teak for the base. This provides and excellent seal and water protection for my wood. When that color turned out too orange on my whitewood, I used briarsmoke and early american over the top to give a “weathered” look that matched the older boxes.
How much did this cost to build?
Since I was able to repurpose some extra 2×4’s, and we already had our screws and stain on hand, I can only give a rough estimate. As of August 2021, if you bought all the materials at once once box will cost you (very rough math) $250-$275.
There are so many ways that someone can build a raised bed, and not every method will be a good fit for everyone. But I’m here to share with you how I built mine and the lessons I learned so that you can put this insight into your arsenal to use if you choose. I am not claiming to be an expert, and I am sure there are alternatives/additions to include to get the most out of your boxes. But these are what work for me and my garden. I also will add now, that I chose to line my boxes, so this method is not 100% “organic”, and you should seek out other wood materials (cedar) should you not wish to line your boxes.
Materials
Below are the materials for O N E 4′ X 6′ X 27″ raised garden box using my building designs. I chose to stain my boards after lining the interior to preserve the integrity of the wood, but if you prefer to not use stain, opt for a wood with more reputable longevity, like cedar.
12– 1″x 6″ x 4′ white wood board
12– 1″ x 6″ x 6′ white wood board
6– 2″ x 4″ x 6′ (for corner supports and wire “hammock” frame)
Hardware cloth
Landscape fabric
16 washers
2″ wood screws
4″ wood screws
Exterior stain of choice (preferably a waterseal)
Method
Cut down 6 of your 2×4’s to the height of your box. (For my boxes, stacking 5-1″x 6″ came out to 27.5″ tall.) We then started at the bottom, and began attaching the boards from the outside to the four corner 2×4’s using 2″ screws. Stack your sides and continue around until you have reached your desired height. Then, add the last 2×4’s that were cut to height in the center.
Next, add your liner to the inside of your box, covering all the sides, but leaving the bottom open for drainage. Secure with staples.
Once your liner is attached, It is now time to go in and build your frame that the mesh hammock will attach to. Using remaining 2×4’s attach a middle support using 4″ screws in the middle of your box, then along the sides in between the 4 corners. Attach from the outside and use 4″ screws to prevent collapse. It is ok if the screws poke through on the inside, these will be covered. Attach your wire using staples, and secure with washers and 2″ screws. (Just for scale, I can easily fit under these boxes…apologies for the strange photo…this is the only one I managed to get that shows this finished step…)
Next, lay your landscape fabric over the mesh and secure with staples. This is the final step of the “hammock”.
Lastly, attach your top shelve boards. I used 2″ screws to secure on the corners and in the middle, giving about 2″ of overhang. These are super helpful when resting on the boxes, or having a place to set your shears/seeds down!
Last, apply your stain. Choose a water-sealant as your base and then build any other color variations from there. You want to protect your wood, anda sealant is the most important part in that. I used Thompson Water Seal in Transparent Teak (the same that is on my Coop) and when it took more orange on the white wood, I went over top with some briar smoke and early american to give a more “weathered” look that matched the older boxes.
That’s pretty much all there is to these. The wire has held up great, even after filling with soil and water retention. You can opt to completely fill your boxes, but this method reduces the amount of material needed to fill a box. You can find my soil “recipe” here. (It’s a variation of Mel’s Mix that gives light, fluffly, well-draining soil)!
That is how I would describe our 5-day trip to Jackson Hole, Wyoming. The weather early September forecasts clear skies, chilly mornings (lows of 35 degrees), and beautiful sunny afternoons (highs of 75 degrees). We are the type of people who love a vacation with a healthy balance of activity, adventure, and relaxation; Jackson checked off all those boxes for us. Not to mention we had great company along the way!
CLICK HERE to jump to screen shot-able suggestion lists of this trip.
This past Labor Day, we took a trip with another one of our couple friends up to the beautiful state of Wyoming, and let me say, it did not disappoint! This was an adult-only trip, so while there are kid-friendly activities mentioned, and though we did see a lot children shredding the trails, be forewarned that this is not a “How-to-Survive-Jackson-With-Children” post. (Jackson is definitely a place I will return with children-it would be a great time!)
Jackson and Jackson Hole can be used interchangebly. Jackson is the name of the main town located at the southern end of Jackson Hole; while Jackson Hole refers to the whole valley, and includes Jackson, Teton Village, Wilson, and the surrounding areas.
Below you will find suggestive day-by-day itineraries based off how we spent our time, but there is so much more to Jackson that we didn’t get to see, so I highly suggest booking a couple things in advance, but overall letting the adventure and town guide you!
Sidenote: The Yellowstone National Park entrance is approximately 1.25 hours from Jackson; however we opted to save that trip for another time because it takes an additional hour driving inside the park before you reach any points of interest. Be aware that a day trip to Yellowstone is possible, but you need to start your day EARLY.
COVID-19: As of our trip dates, the state did not require masks in public/outdoor spaces unless decided by the business; however, majority of businesses and restaurants require masks upon entry, and will provide them if you do not have one with you.
Day 1
Fly out in the morning or early afternoon.
There are two options when it comes to airports near Jackson: Jackson Hole Airport/JAC (15 min drive into town) and Idaho Falls Airport/IDA (1.75 hours into town). JAC is a smaller airport, while IDA is the larger airport. JAC is more expensive to fly into; however, we chose to fly into JAC strictly because this was such a short trip for us and we did not want to spend a good portion of our day driving from the airport.
Be sure to bring a mask, because federal requirements state that you must wear one at all times in the airports/on the airplane.
Pick up a rental car at the airport
Jackson does utilize Lyft and Taxi’s (Uber is here, but not as prevalent), many hotels provide shuttle services, and downtown is extremely walker friendly, so you definitely can get around without a rental car-but if you are planning on taking any day trips, get a rental. (For reference, a 30 min taxi ride from downtown up to Teton Village will run you about $45 one way). We used Enterprise and were able to pick up our car right at the airport, which was a super easy/quick process given that we flew into the smaller airport and had virtually no wait time.
Check into your hotel
I highly recommend staying in a hotel/resort downtown during the summer months in Jackson. It’s extremely walker friendly, the shops/restauraunts are localized here, and its adorable. I think Teton village would be perfect for a winter stay (ski in and ski out resorts), but downtown during this time of year could not be beat.
Because we are Marriott members, we stayed at the Cloudveil, which is an Autograph Collection hotel just built off the square. It was very nice, but do not waste any “free suite upgrades” on this hotel—at this location the only upgrade they gave us was a standard king room with a view vs the courtyard view, which was nice, but since we were on the second floor overlooking one of the very popular ice cream shops, we kept the curtains drawn majority of the time for privacy.
The aesthetic of the hotel is beautiful: the location is perfect, each “king” bedroom has a fireplace, the bathrooms were roomy/clean, the Bistro (hotel restaurant/bar) was great, and it does have an outdoor pool/hot tub, as well as a rooftop terrace with fire pits. Our concierge Matt was stellar, and was able to get us exclusive reservations on several occasions. This is a beautiful hotel if you are willing to splurge, it is one of the more pricier hotels in the area. If not, there are several other options to choose from (hotels and AirBnB), but again, I highly recommend staying close to downtown for ease of access, especially if you are taking a shorter trip.
Explore Downtown
We got into town around 3pm and spent our first afternoon roaming the town and shops. There are several local galleries, bookstores, souvenir shops, plus so much more. And don’t forget to take your picture under one of the iconic antler sculptures located around the Veterans Memorial park.
Eat Dinner at Snake River Grill
You will want a reservation for this restaurant, as it is one of the most sought out places in Jackson (many celebrities will eat here when visiting). Come hungry and willing to spend some $$$, because they pride themselves on “over 25 years on the Town Square… [and being] the locals’ favorite fine dining experience… featuring 300 wines and signature cocktails…SRG is a must for fresh, uniquely-crafted New American cuisine.”
The food was pretty good, and my personal favorite item we ordered was the salmon potato pancakes (just try it, its great). Unfortunately, we had a couple of “meh” cocktail moments here, so I would stick to wine.
Grab Ice Cream at Moo’s Gormet Ice Cream
If you happen to have room for more, pop over to Moo’s! Known for their natural sourcing, be sure to try the huckleberry ice cream! In Jackson, you can find huckleberry-flavored everything, so be sure to try it all!
Day 2
Grab Breakfast/Coffee at Persephone’s
Wake up early (or don’t, we know I don’t do early mornings) and head out to coffee/breakfast. If you like characteristic, cute coffee places, Persephone’s is a must. They have amazing baked goods and croissant sandwhiches which you can eat in an outdoor courtyard that makes my garden dreams swoon.
Head up to Teton Village for the Day
Teton Village is a smaller town at the base of the mountain and is popular in the winter month for the convenient lift access, but there is plenty to explore during the summer months as well! It is a 30 min drive from downtown and has beautiful views along the way (you may even be lucky enough to see some moose!) There is plenty to do in this village, and below are some activities members of our party participated in during our day at Teton Village:
Ride the Gondola to the top of the mountatain
I personally don’t like gondola’s, but the views are amazing during the ride and at the top. There is a restaurant that overlooks the valley, and unfortunately it was closed for a private event the day we went. I would suggest trying to eat there on a weekday to avoid crowds/events.
Click here to purchase gondola tickets. (When you buy online you save $7).
Hike a trail
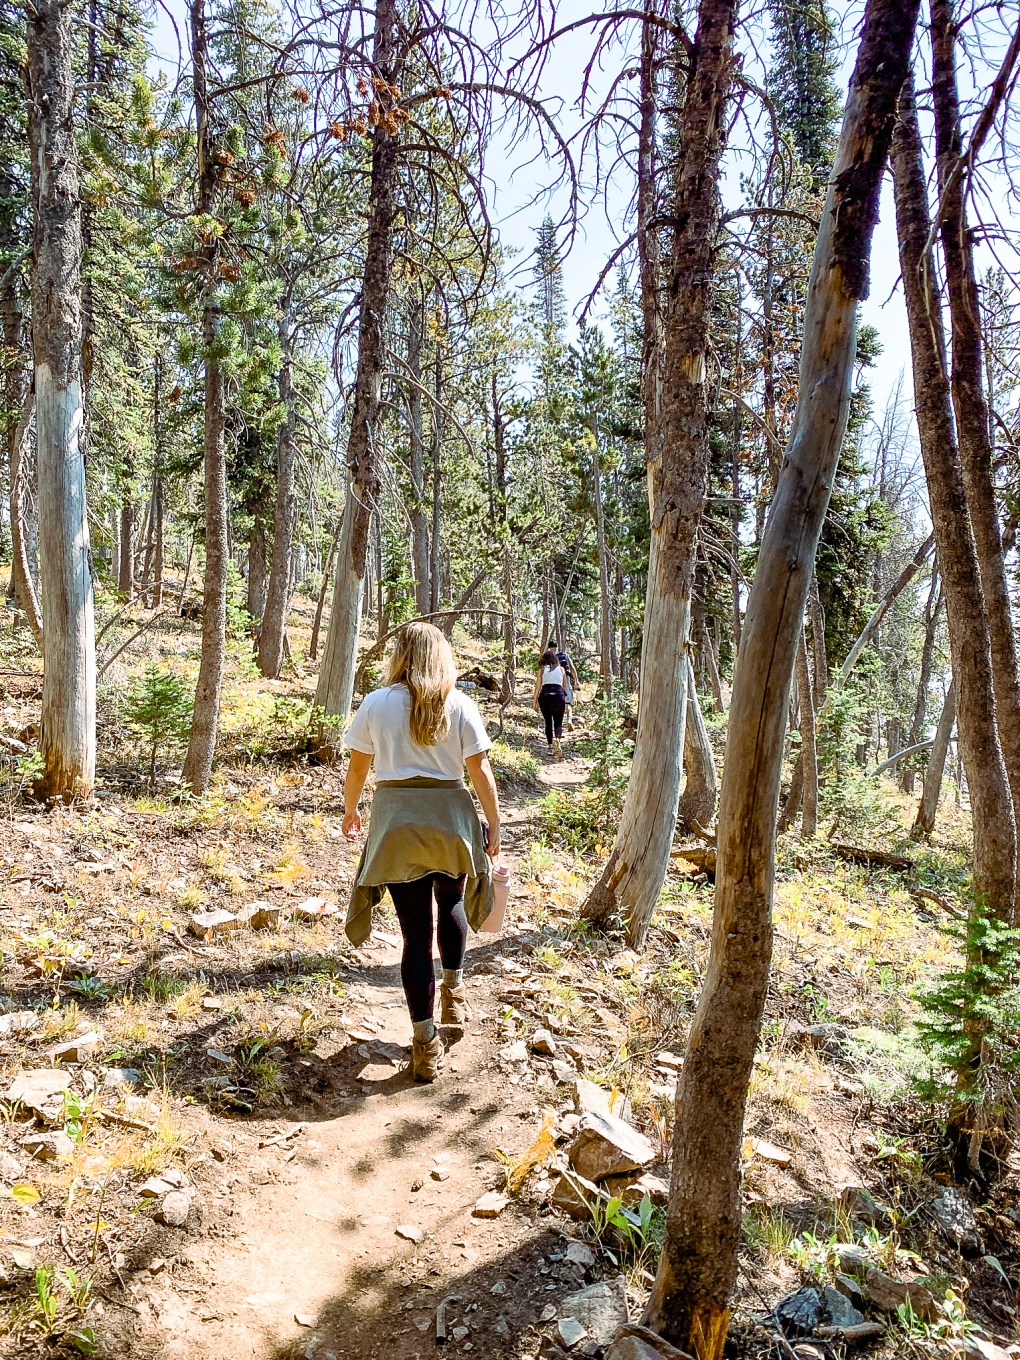
Once you reach the “top” of the mountain, there are several trails at varying diffculties that will take you to the tip top of the mountain, or all the way to the bottom! We chose to hike Casper Ridge Loop, which was a beginner/moderate loop that took us about 1.5 hours to complete. It was challenging with steep inclines at the beginning, but is doable without any hiking gear. This was hands down the most best view, and worth every second.
They have really good guacamole/salsa/queso, and great cocktails- Try a spicy margarita-you’ll find these on the menu most places because they’re very popular in Jackson! (If you aren’t a “spicy” fan, get it with half regular tequila and half infused tequila to knock the spice down!) Be prepared that this is another finer dining experience and will be a little pricier. If you can, sit outside on the balcony, but don’t worry-the indoor seating also showcases beautiful views.
Relax!
The base of the mountain has several seating options to just sit, sip a drink, and just take it all in!
Dinner at Local Restaurant and Bar
Located downtown, Local was by far my favorite restaurant of the entire trip. The menu features both classic and specialty cuts of locally-ranched meats and game alongside fresh seafood, shellfish, house-ground burgers, and seasonally-inspired food. (Oysters were amazing!)
Drinks and Dancing at Million Dollar Cowboy Bar
Next door to Local is the town honkytonk hotspot: Million Dollar Cowboy. This is a great time if you love two stepping (they have live performances on the weekends), cowboy hats, and people watching while drinking a cold one. There is a cover fee of $10 to enter.
Day 3
Farmer’s Market
Grab a bite to eat and wander around the local farmer’s market that is set up downtown every Wednesday and Saturday from 8-12. Here you can see I bought a cinnamon roll the size of my face, and it was delicious.
Whitewater Rafting
If you need an adventure, go whitewater rafting down Snake River! We booked through Jackson Hole White Water and we had the best guide! He was very knowledgable, and couldn’t have given us a better experience (I got to “ride the bull” which means you get to sit on the front of the raft and hold on for dear life, laughing and getting soaked the whole time you’re up there!)I do recommend renting a wet suit, the water this time of year is about 60 degrees farenheit, which sounds doable, but it’s COLD. Also bring a set of towels/dry clothes to change into after your float! (Forgive my screenshot, I didn’t want to purchase an unwatermarked photo for $50…)
Burgers and Milkshakes at Jackson Drug
Located on the square, this “drug store” first opened its doors in 1919! You can find the rest of their story here.
Visit the Local Rodeo
The rodeo grounds are located right outside of downtown, and I think they have the best rodeo clown I’ve ever seen. During season, rodeos are every Wednesday and Saturday (with additional dates during July and August) starting at 8pm, with tickets for purchase starting at $34. (Reserve/purchase your tickets from jhrodeo.comto avoid major third party upcharging).
Day 4
Breakfast at Cafe Genevieve
Great coffee, great food, cute atmosphere and quick service.
Race Down Snow King Mountain
Located just outside downtown at Snow King Resort, there is Snow King Mountain, where in the summer is full of activities including an alpine slide, mountain coaster, mini golf, ropes courses, and much more!
Round of Golf at Snake River Sporting Club
This is a private club that our concierge was able to work magic to land a tee time for the guys, but if you are able to pull some strings, definitely check this course out. It was beautiful, but I’m also sure that any golf course in this area would be a perfect end to a trip!
Massages and Spa at SpaTerre
This spa is located in Teton Village inside Teton Mountain Lodge. They provide facials, massages, and several other services to choose from as a way to relax before returning to “real life”. *Reserve in advance if possible*
Order in Pizza from Hand Fire Pizza
Rumored to be the best pizza in downtown, and I agree it was pretty good. Our crew decided to stay in, order pizza (picked up by the guys at the storefront) and play boardgames. We ordered a classic pepperoni and a pesto chicken pizza, but you honestly you can’t go wrong with anything from their menu. I couldn’t have imagined a better last night.
Day 5
Grab a quick breakfast at the hotel Bistro, soak up the mountain views, and head up to the airport, crying because you are leaving but looking forward to the day you return. You also could fly out later and squeeze another one of the numerous activities in the Jackson has to offer.
You’ve just skimmed through a snapshot summary of our 5 day visit to Jackson, Wyoming. In between these lines live so many good memories, and I cannot even begin to cover all the great things Jackson Hole has to offer. I even learned that these mountains are highly sought after for their winter slopes, so maybe there will be a snowy return for us in the near future?
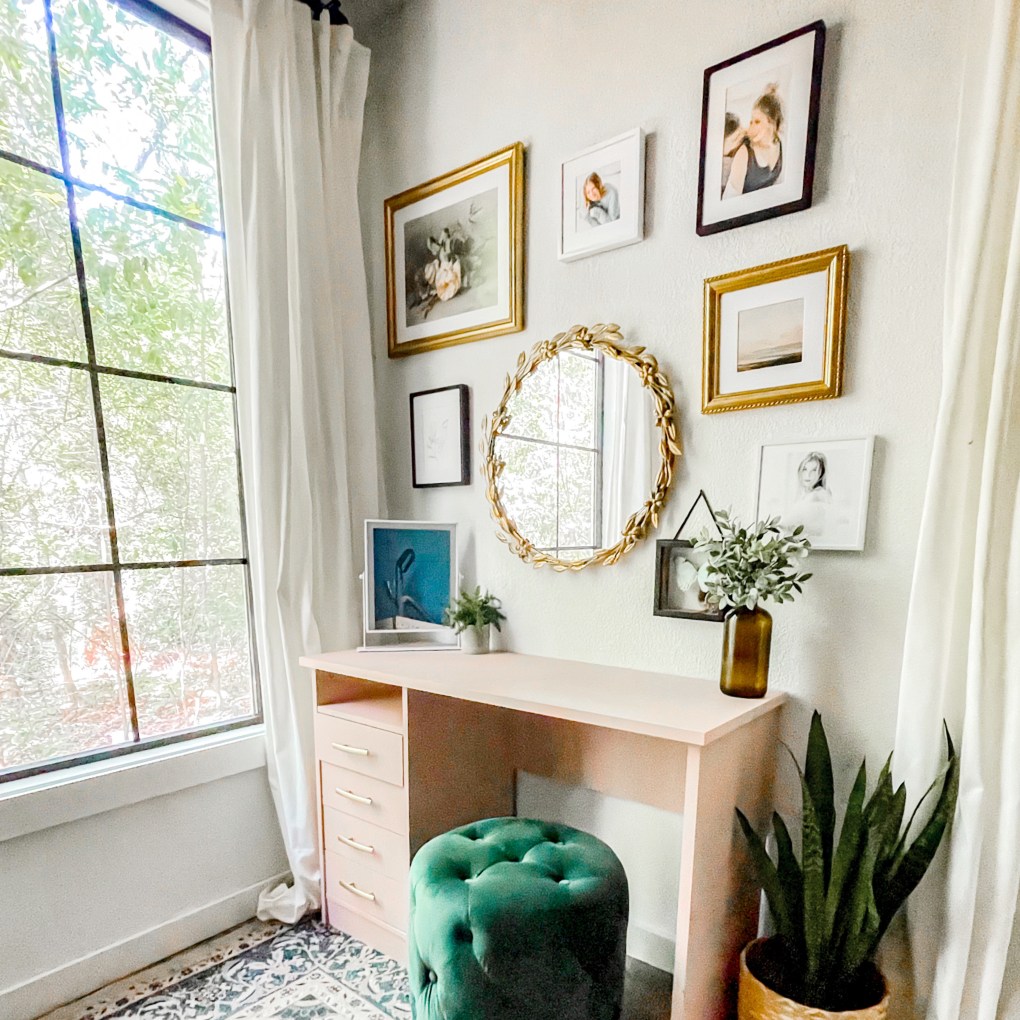
Taking a break from our garden series to highlight one of my favorite little corners (currently) of our little home which sits in our guest bedroom with the Murphy Bed we built several months ago. This room screams functionality. We only have 2 bedrooms in this 750 sq ft temporary home of ours, so this second room has become a second closet, a place for storage, occasionally guests, and now a place I can go to get ready for the day.
I don’t know about you, but I am not particularly fond of getting ready in the mornings. I spend a lot of my days covered in sawdust, sweat, or dirt (most the time a combination of all three), so sometimes even brushing my hair out feels like a pointless task, let alone fixing it.
I’ve actually been meaning to turn the drab little corner of this spare room into a vanity for a couple of months now, but it wasn’t a priority because I kept telling myself “we’ll be in the big house soon, I won’t bother”. Plus we’ve been pouring our hearts into our garden projects, so it fell on the back burner. But when Frame It Easy came to me wanting to partner up on a project, I knew it was a sign that this corner didn’t need to wait any longer, and that it was time to create a space that I would enjoy sitting down in.
Frame it Easy is exactly what it sounds like: custom framing made extremely easy! They have a great selection of frames to choose from as well as customizable mattes and glass finishes, and you can upload your art/photos directly on their site where they print out high-quality framed images shipped right to your door!
To paint the desk, I used Sherwin Williams Emerald paint after sanding with a light sandpaper. I am planning on adding a piece of glass over the top of the vanity desk, but if you are not going to do this and anticipate heavy use (or kids) I would prime with B-I-N Primer prior to painting for best results.
Gallery Wall
To hang my gallery wall, I use painters tape and “trace” the oultine of my frame, as well as add a piece to mark where the hanger sits. I then stick the “tape frame” on the wall and am able to move them around. The tape may fight you a little bit, so you can also use paper to trace out your frame sizes and play with placement on the wall.
Windows
Honestly, the windows make. this. space. glow. To tranform boring white windows, all you need is some black spray paint, and electrical tape. Clean your windows really well, then tape off all the glass and spray paint your windows. Once they have dried, use the electrical tape to make a paned grid, or to go over existing grids! It that easy. Electrical tape is black on both sides, so rest assured that these look great on the outside as well (if it is a front facing window, be sure to paint the frame of the exterior window as well. (You can also go over the white existing panes on the exterior since electrical tape is waterproof as well!)
And just like that, my drab little corner is like Cinderella ready to go to a ball. I can just hear the birds chirping now. I’ve got some additional tweaking and clean up to do still, but wow. What a transformation!
Wow! I cannot believe we are over halfway through this garden informational series! If you are new, welcome! Over the past couple of weeks I have been going over some FAQ and general information regarding our garden project. Last week, I discussed our garden groundcover and gravel, as well as the reasons behind our choices- If you’ve missed any previous post, feel free to click the links below to visit them and learn more about how we built up our garden so far!
Like most everything around here, I don’t choose to do things the easy way, or the way that everyone else has done it before. I want my space to be uniquely “me” and therefore I am constantly pulling my inspiration from everywhere I go! I actually saw a similar chevron fence from a designer on Instagram (I wish I could remember who it was) and while I could tell their’s was done professionally, I was determined to incorporate this beautiful zagged pattern into my life at home!
I will also be the first to note that this was NOT done by a professional, it was done by me, with help from the hubby when he was home. We are not professionals and I have no desire to ever claim to be one. The fenceline is not perfectly straight nor are the angles 100% perfect, but I am 10000% okay with that. I learn a lot by doing and making mistakes first hand, and love that I can then share my mistakes with you so that you (hopefully) don’t make the same ones I do. At the end of the day, I love our fence so stinking much, and cannot wait to watch the vines grow and see how the plants will look with the black background—so. stinking. stoked.
So, with that disclaimer, let me tell you how we did it.
This page may contain affiliate links.
Materials:
2×4’s for fence panel frames
1×3’s for chevrons
4’x4’x6′ treated posts
4’x4’x10′ treated posts (if doing a gate arbor)
Concrete bags (60lb is much more managable than the 80lb-ers)
If you have it in budget, RENT AN AUGER. And not just one of those hand held ones—a big one. It’s worth it – especially if you are a 5’2″ 135 pound lady. And where we rent our machinery tools from the pricing was not that large of a diffference, and like I said, totally worth it. This one could be pulled behind a vehicle with a hitch, and rolled around to each hole by the operator, making it…easier…I say easier because I fought with the slope and constant pull of the auger to roll down the hill. But I did it, and you can too!
I will note that if you want a straight fence line, use the string method and measure out your holes real time while you are augering. (click on the link to watch a video) Had I had another body (or more patience) when I did this, I probably would have done the more sure-proof method for a straight fence.
Because I pre-measured all my holes and marked with spraypaint prior to starting, I did not get the cohesive 8-foot distance in between each post that I was shooting for, nor is my fenceline perfectly straight…rookie mistake…but it’s okay.
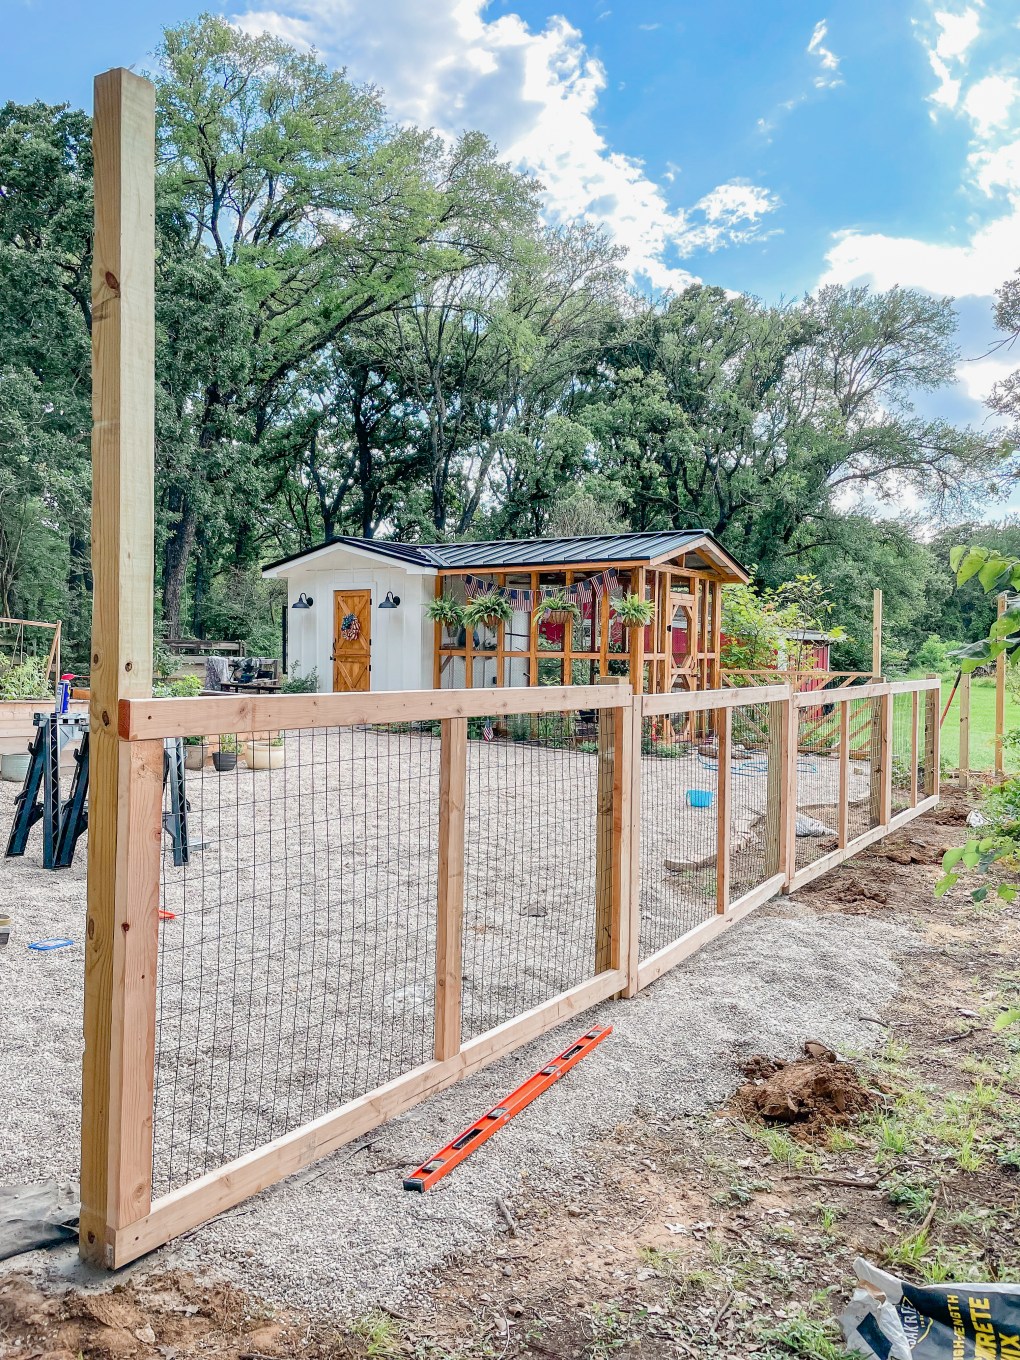
Time for a two-person job: use a post hole digger to remove any leftover dirt, and to get a cohesive depth. (We set ours 2′ down). Then set the TREATED posts in the hole (it is important that you spend the extra $$$ on treated posts, this keeps your lumber from rotting over time). I highly suggest two people because it makes life easier. One mans the concrete, the other levels and holds the post while the concrete is being poured.
***NOTE: You can mix your concrete in the hole by filling halfway with water, then adding dry concrete and mixing with a stick, then repeating until your hole is full. Don’t over saturate your concrete or your post may become unlevel/not flush.***
The Build:
Next, we gonna make a fence panel frame, so take the 2×4’s and cut them to desired length. (We designed ours so that each panel will be attached to the outside of one post, so each panel will meet halfway on the post width. You can also attach them in between the posts, but for me that math made my head hurt and made the process more difficult, so we attached the panels to one side.)
Basically, we are making a (roughly) 8’x4′ rectangle with a supporting verticle piece in the middle out of 2’x4’s. Adust for the width of the 2’x4’s when making cuts, and assemble them all with kreg jig screws (AKA the best invention ever).
Using the staple gun, attach your wire to the frame on one side. We had to cut the wire to fit our frame even though our panels were 4-foot tall, and the wire claimed it was 4-foot wide…I’m confused too but we made it work and cut everything down. This step isn’t necessary, but I wanted to minimize the chances of critters coming in the garden via the ground. If they were going to get in, they have to work for it.
We then attached each panel to the post with wood screws. This will ensure that the frames are extremely sturdy and secure. You can also see below that we staggered our fence with the natural slope, setting the bottom corner about 1/2″-1″ from the ground and leveling the top before securing the other side. Here’s what the panels look like before adding the chevron pattern:
Now, for the chevrons I wish I could give a more guided direction that is easy to replicate…but honestly…the whole process was a guess and check game. Because the panels are not squares, nor are they even, my angles could not all be 45 degrees.
Here you will use a nail gun and nails: I chose a starting point (I wanted the points to meet at a diagonal point on the shorter ended of the panel) and did all my cross bars at once. On the end pieces and on the middle “halfway” mark of the support beam, I did try to do 45 degrees so that the points would line up together…
Then I measured 8″ from each “tip” for the start of the next one. As I said, these edge cuts were 45 degrees and I let them end up where they wanted on top.
I know that makes absolutely no sense, but the best advice I have (if you are like me and not math-brained) is to cut as you go, and find a method that works for you. I had to do each piece at a time because no two panels were the same size (SMH and my lack of patience for the string method). Here you can see how the chevron pattern ended up working out.
The Finish:
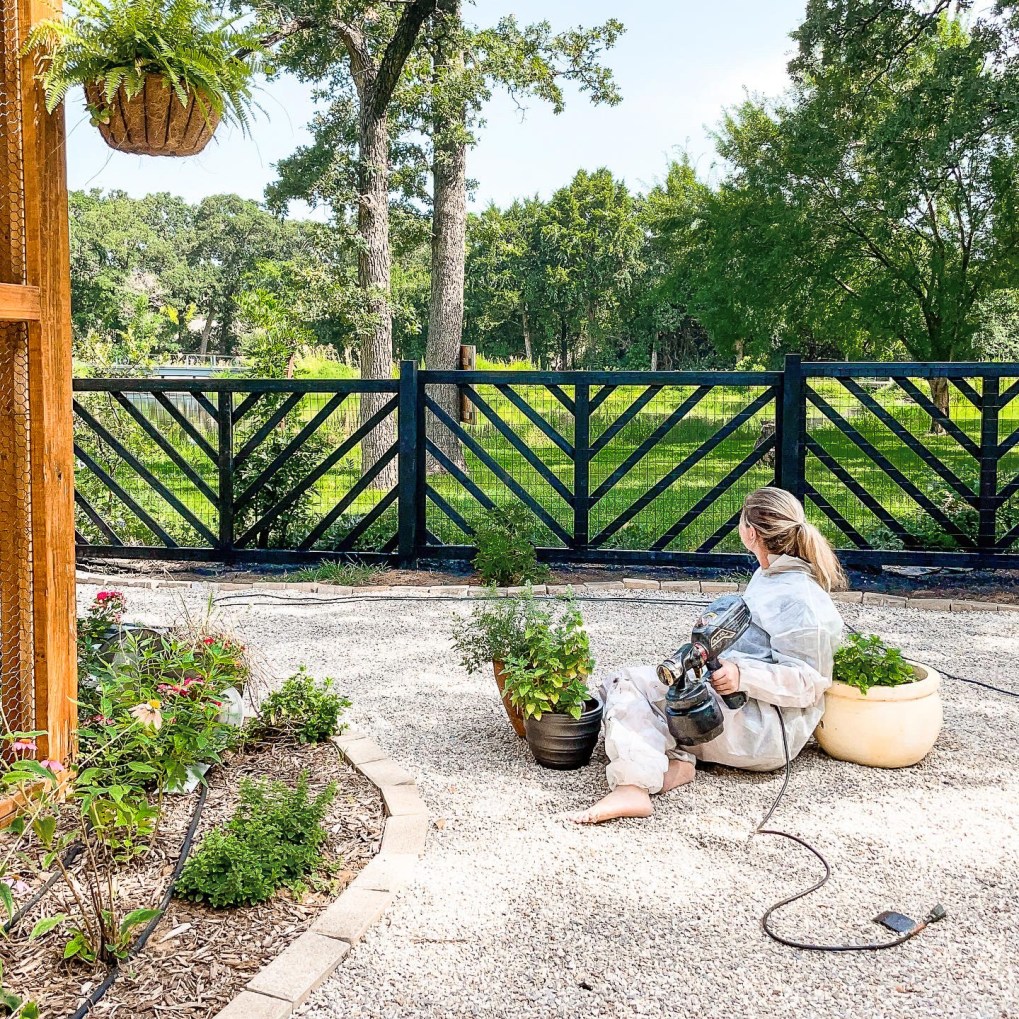
I went back and forth on my decision to stain the fence to match the coop, or to paint it black. But at the end of the day, I chose to do neither- and I stained the fence black. This gave a softer, more natural black and allows the grain to peep through, and gives the perfect contrast to this area.
Using my Wagner SprayTech Flexio 570 Handheld sprayer, I braved putting my beloved little sprayer through the true test and STAINED MY FENCE via a sprayer! This is something I was terrified of trying, but I’m so glad I did because hand staining was going to be a pain in the booty. I was dissapointed when I could not find a black exterior stain, but instead used Minwax Wood Finish Oil-Based Interior Stain in True Black . After carefully researching, I found it best to dilute your stain in a 3:1 ratio (stain:mineral spirits) as to avoid clogging your sprayer. This method worked like a dream and within no time my fence (and I) were covered in black stain (reminder to cover anything you dont want stain on– overspray is no joke!)
Once the stain had plenty of time to dry, we coated everything in a clear exterior deck sealant.
Final Touches
If you follow me on Instagram, you know that the gate arbor was a toughie. I couldn’t decide with the style I wanted but ultimately ended up with a simple straight arbor (made out of 2 8″x2″ boards (cut to length) screwed to the top of the posts)and simple cross beams made from leftover wood.
I then added some fence toppers to my posts and stained+sealed them in the same fashion as the rest of the fence. Easy peasy way to take these posts from drab to fab, and add a little feminitiy to all the harsh lines. Pretend that “porch” sign says garden because one day I’ll change it- the style was just too perfect to pass up! I can’t wait to get to planting when the weather cools down and watch how the addition of greenery will transform this space even further!
“Creativity doesn’t wait for that perfect moment. It fashions its own perfect moments out of ordinary ones.”
Bruce Garrabrandt
Thank you for sticking with me as I went through the “clear-as-mud” process of our fence. Because most of the projects we do are curated from visions in my mind, trial and error is apart of everything. But I think that is what is so stinking fun about it all! Check in soon to learn how I make my raised garden beds!
In my last post, Garden Series: Plans and Dreams we offically started my garden series where I hope to cover any questions regarding the plans we have for our garden area (which includes the chicken coop)!
I plan to cover majority of topics (size, layout, logistics, design details, maintenance) throughout a series of 4 posts:
So make sure to check back in if you are having questions regarding our garden space, and if you have any other questions/topics you would like me to cover, please send me a message over on my Instagram: @theroostingplace.
Here we are going to talk about methods and materials we use in our garden area for ground cover, and some of the reasoning behind our choices. Originally, we were going to wait and choose a rock material after the fence was up, but realized that we were going to need approx. 10 cubic yards to cover the area of the garden, and therefore would need a delivery truck. And so began my shoveling journey.
In-Ground Beds
When it comes to our in ground garden beds, I till (using this amazing tiller attachment for our weedwhacker) the area, plant my plants using a good splash of Root Stimulator, then use cardboard boxes (usually pulled from the recycle bin) as my “weed barrier”. This is a much more natural way of blocking the weeds, allows moisture to soak in, as well as retains moisture during watering, and will decompose nicely over time, adding nutrients to the soil below.
I have had very little weeds come through in my existing garden beds, and really only notice weeds where there are breaks or rips in the layout of the boxes (with any weedbarrier, a good overlapping method is best to block weeds)! As a general rule of thumb though, if you spend about 10 minutes/ day out in your garden checking and pulling weeds, there is very little “mass” maintenance needed!
One of the most important addition to your garden beds is MULCH. Mulch is a material (such as decaying leaves, bark, or compost) spread around or over a plant to enrich or insulate the soil. Mulch can be dyed or left natural for decorative effects, but mulch is so much more than just a pretty face. Benefits of mulch include, but are not limited to:
Reduces weed growth by keeping light from reaching the soil surface.
Reduces water loss from the soil surface, which helps maintain soil moisture.
Moderates soil temperatures, keeping it warmer on cold nights and cooler on hot days.
Protects bare soil, reducing erosion and soil compaction.
Protects plants from the harsh conditions of winter freezes, thaws, and winds.
We currently use natural, untreated mulch in our beds as well as the chicken run, but I am considering buying black mulch (beds only) to give a pop of contrast. No matter what color you choose, be sure to add mulch, and refresh/replace the mulch as needed to avoid any disease.
Edging
Several months ago, I saw this add on Facebook selling pallets of leftover brick pavers for $25/pallet, so we jumped on it and these pallets have been sitting in our yard ever since, just waiting to be used. Pavers are great choice for edging. I love the way they flow naturally with the rock ground cover we chose, and to me they add in another element of nature.
When it came to the vision for this space, I always envisioned covering the entire area with some form of gravel/rock material. The benefits of doing this include:
Less/ viturally no weeding
No mowing/weedeating to keep it manicured
Barefoot friendly
Deters animals from using this space as a bathroom
Creates a beautiful, cohesive look
The Material:
We ordered 10 cubic yards of crushed limestone, which will cover the entire area with about 3″ of depth.
Why crushed limestone and not pea gravel?
I’m so glad that you asked. When we visited our local stone yard, I was under the impression that pea gravel was the obvious choice, however, after discussing with the rock-man the intention for the stone, I was then shown this beautiful crushed limestone as an alternative to pea gravel. The reasoning? It packs down much better, making it the better option for footpaths and rolling cart wheels over! I can still comfortably walk on this rock barefoot, and I especially love how it changes color when wet!
The Process:
The moment I realized just how much 10 cubic yards of rock was
Materials needed:
Weed Killer or Till the Area
Weed Barrier (I used a combo of Landscaping Fabric and Tar Paper)
Landscaping Pins
Wheelbarrow
Shovel
Rake
LOTS OF ROCK
Because this area is massive, and because it is mosly dedicated to walking paths, I was not about to use the tiller to get rid of the existing grass and weeds. Instead, I used Round Up to kill the existing ground cover. I sprayed it all thouroughly, and went over the tough areas twice before rolling out my weed barrier.
Landscaping Fabric:
Pros:
drains well
Safe for planting
Cons:
Rips easily
Weeds can poke through over time
Expensive
Tar Paper:
Pros:
“Heavy duty”
Less ripping
Thick
Cost effective
Cons
Takes longer to drain
Can be harmful to plants
I used the above pros and cons of both these materials to my advantage. I placed the tar paper on majority of the areas where I knew would only be walkways and placed landscaping fabric in areas where I forsaw the water flowing down to, or areas closer to my garden beds; by doing this method I saved a good amount of money! (Fun Fact: you can also use old roof shingles as a weed barrier in walkways!)
We used landscaping stakes to secure the barriers, then got to work. Wheeling and Shoveling and Raking, repeat, repeat, repeat.
Overall, it took me about a week and lots of wheelbarrow loads to completely spread all the gravel evenly under the Texas summer sun while Harley was working, but the end result is so worth it. This rocks tried to crush my spirit but I proved to be more resilient than I even knew, even if I did sleep for a week straight when this part was done. 😉
As another postitive out-take: I rarely have to weed any of this area, and when I do I’ve noticed it is just this one pesky species of weed that always finds a way to pop up, but they’re extremely easy to pull so this method is very managable when it comes to weed control. So if that doesn’t motivate you to try hardscaping your garden area, I don’t know what will!
Talk Soon,
xx, Lanna
Check out my last post: Garden Series: Plans and Dreams to see the inspiration behind this space, and check back next week to learn about our fence!