If you’ve been following along on our Instagram, you’ve already seen what we picked for our Murphy Bed color, but for those of you joining us here, I cannot wait to reveal this BEAUTIFUL color to you! I was deciding between 20 different colors (I know, I had no clue what direction I wanted to head.) But this beautiful blue is the perfect compliment to this space!
When I first started out with this project, I planned on leaving the bed and shelving units white. However, after living with them, I felt that the space needed something more! Break out the paint swatches! After collecting 20 swatches, I narrowed it down to the ones below.
My rug is from boutiquerugs.com and I absouletly love it! The colors are beautiful and the texture is so soft! I would reccomend adding a rug pad if you like thick rugs.
I finally I bought sample sizes of 6 colors to test on the bed. I highly suggest testing any paint contenders in the space they will go. Colors can look different in all lighting, as well as the time of day so by physically placing the color where you want it, this garuntees you love the choice you make! I opted out of the pink mainly because I wanted this room to flow with the other greens and blues of the house scheme…but you better believe I will be using Pressed Flower in the future because WOW. Every single one of these colors would have complimented this rug beautifully…so let the testing begin…
Once I decided on a color, we taped off the front of the murphy bed so that we could spray using our WagnerFlexio 590 paint sprayer. I love this sprayer because it is lightweight, has 2 different spraying direction options and multiple spray settings. Great for beginner projects! By using a sprayer, I was able to get into all those small seams of the murphy bed front design, and get an even coating. Had I not decoupaged the shelves, I would have sprayed everywhere, however we had to roll and cut in by hand our shelving units to make sure we were precise.
I forgot to mention that we also added crown molding to our shelving units, and painted after we had caulked all the seams to give a uniform “built in” finish to the whole piece. But for the moment you all have read to find out: my final color choice was Smoky Blue by Sherwin Williams. We used a satin finish in their Duration paint to ensure a tough coat since this piece will get a lot of wear and tear over the years.
Overall, I love that I decided to add color into this room. It typically is difficult for me to go bold in color when it comes to large, permanent pieces, but in this little house, I am learning to trust color! This room calms me down and allows me to escape from the hectic chaos that fills these walls, the blue just makes me happy! Next week, I’m going to fill you in on how to make a super easy “upholstered” headboard like the one I added inside the Murphy Bed!
Tell me, what do you think of using bold colors? What holds you back from trying out new things? For me it’s the fear of the unknown…but we are getting braver every day!
Okay y’all. This planter was a rollercoaster for my emotions, and caused me to question every single step I took, but the end result is AMAZING! I really love the look of tall, cement planter you can buy from various stores, but I refused to spend upwards of $100 to get one. So I decided to make one myself out of two 5 gallon buckets and only spent $12 (not including tools)!
2 80lb bags of Mason Mix Type S Mortar by Quickcrete (you will have cement left over)
Approx 3 ft. Chicken Wire or Hardware Cloth Wire (the chicken wire was easier to manuever into a rounded shape, so it depends on the look you want)
1/4″ screws
Rubber Gloves
Concrete Trowel
Concrete Sanding Block
Tarp to lay on work surface
Process
Lay a tarp on the ground (I used a contractor trash bag, it doesn’t matter what you use as long as your work surface is covered-it will get messy!). Remove the wire handles from your buckets and cut off the bottom of one of the buckets. Then stack the two on top of each other with the original openings touching. (The newly cut hole is at the topnow.)
(I hadn’t laid my tarp down yet and regretted it, lay the tarp down!)
Next, attach the wire to the sides of the buckets using screws. (I experimented with two different types of wire, mainly because it is what I had on hand). Chicken wire is more flexible and will allow a more “curved” pot, while the hardware cloth will result in a straighter pot. Either is fine to use, but if this step is skipped entirely, you will find yourself running to the hardware store anyways-CONCRETE WILL NOT STICK DIRECTLY TO THE BUCKET. Yes, I tried it and it failed miserably. Trim the top of the wire to be even with the top of the bucket.
Here I tried to put concrete on without wire, and found out the hard way the concrete needs the wire to stay in place. Use the wire.
After putting on gloves (and a mask if you don’t like breathing in tiny concrete particles—maybe one day I’ll learn to put my mask on more often…) begin to mix the concrete. By mixing small amounts at a time, this gives more time to work with the concrete before it dries out. Add in small amounts of water at a time and use your trowel to mix until the concrete is somewhere between a thick pudding and cooked oatmeal consistency. If the mixture get too watery, slowly add a little more dry concrete until the right consistency is acheived. (You will learn as you go what the best consistency is, so if its not perfect the first time don’t worry.)
Begin to “smoosh” the concrete through the wire with a gloved hand. On the bottom half, the concrete will fall to the bottom and hit the ground-this is okay, just keep building it up. Once the wire has been filled in, plus a little more, STOP adding concrete. This takes several coats and if more is added it will keep sloughing off. Take the trowel and begin to smooth over the wired surface, then leave it to dry for several hours, seeing a noticable lightening in color indicates the coat is dry. (It looks ugly at this point-I promise it will get better!)
Once the first coat (or brown coat) is dry, it’s time for coat number two. I found applying with my gloved hand and smoothing over with the trowel was the easiest way too apply coat number two as well. Fill in any low or uneven spaces, smooth, then leave it alone to dry!
Once this second coat has dried, it is time for the final coat! For this coat, place a small pile at the base of the planter, then use the trowel to slide the cement up the side for a smooth finish. Use a gloved hand to add cement to any uneven spaces, the smooth again with the trowel, beginning at the bottom and working upwards. I also found that just smearing on the top coat with a gloved hand (no smoothing) gives a unique texture as well, so play around and see what you like best! Because the trowel is straight, it can be difficult to get a perfectly round, smooth finish, so keep this in mind and be playful with the look!
When final coat is throughly dry, use the concrete sanding block to smooth out rough edges. Smooth in a vertical direction to go with the lines created by the trowel.
Dust off excess concrete (I used a broom), and drill holes in the base if you forgot to at the the beginning (@me).
Now it is ready to be moved to it’s new home! NOTE: the planter will be heavy- it is advised to move it using an extra set of (strong) hands! For me, this is right next to our front door. For now, I placed the pot my fern came in directly into the cement planter, but aim to fill the pot halfway with mulch and the remaining space with potting soil.
Cost Breakdown
As a disclaimer, I only spent $12 (not including the tools) because we get our 5 gallon buckets for free with a contractor account through Sherwin Williams, and we already had the wire on hand. So I decided to give an honest breakdown of what this project realistically cost!
For a grand total of $50! ($30 if you don’t include the trowel and sanding block which can be reused for other cement projects!)
I love how this turned out though I will say, if you are looking for a smooth finished surface this is not the method for you! This will not create a “perfect” finish, and I suggest trying to make a cement mold instead of using a coating. But if you are looking for a more natural cement planter, without spending $$$, give this a try and let me know how it works for you!
Last I talked about our demo process of Little House- the first step to turning this shack into our temporary home until our “Big House” is built. It took us several months during the heat of Texas summer to flip this shack into what we know now, and are still doing work on it to make it feel like home. We aim to turn it into a guest house/AirBnB once we move into the Big House, so the aim of this whole process is to make it homey for now, and for later.
You can find all our current projects on my Instagram: @theroostingplace
If you haven’t read my previous demo post, check it out here!
Where we left off: we removed the front half of the house! Once we demo’d the front half, it was time for a group of framers to come in and reframe the front and add a new roof. This was another one of those moments where we knew that it was time to call in the pros-there are certain jobs I just don’t trust ourselves to complete and the roof seems pretty important. It was also July and extremely hot, no thank you.
Because our goal was to sell our old house in Houston and be able to move into this house by September, we also chose to hire out placement of the exterior siding and the roofing so the job could get done quickly and correctly. We probably could have done these, but as I mentioned earlier it was July turning into August in Texas, and I chose a black standing seam metal roof for the house….those poor men did an excellent job (I did tell them I was sorry for my color choice and the timing, but love how it looks so their hard work was worth it!) We chose to paint the exterior Alabaster by Sherwin Williams, which in the evening will pull yellow-you have been warned!
Now this little building is looking more like a house! Next we move onto interior. Harley and his dad ran all the A/C ductwork, as well as the electrical. We used the existing electrical box and A/C unit, just replaced/reconfigured wiring and ducting.
Blessing the House
Once all our interior walls were built, before we installed insulation and sheetrock went in, I asked our friends and family to send us a Bible verse or quote that was special to them. We then wrote all these on the studs throughout our home, and prayed over the house. This was a very special moment to us both, as we plan to spend the rest of our lives on this property, and wanted to ask a blessing over all who entered these doors. I plan to repeat this event with family and friends in attendance once the Big House framing is complete. I have a digital guide in the works that will be available for purchase that will provide an extensive list of verses we used, organized room by room! It will be coming soon!
Let’s Add Some Flesh to Those Bones!
We were then ready to insulate and sheetrock (yep, hired out the sheetrock because it’s heavy and we were pressed for time).
Once sheet rock was in and textured (I originally did not want texture, and will not be using any in the Big House), we could officially paint, and install floor. Tip: to make it easier to choose a paint color, paint your samples on foam boards! This way you can move them from wall to wall or room to room to compare lighting ! Colors look different in different lighting so be sure to place your testers in all areas at different times of day to best gauge your preference. We also set up a paint tent outside which we used to spray our baseboards, which made it much easier than having to paint them post install.
The interior paint color I chose for walls, trim, and ceiling is Chantilly Lace by Benjamin Moore, but we color matched at Sherwin Willaims using their Duration paint line in a matte finish. (Many people prefer satin in order too easily clean, but I haven’t found a major issue cleaning my matte finished walls).
For me, this is the perfect shade of white for interiors. I don’t find that it pulls too yellow or too blue, and looks beautiful with our black contrasting doors.
That’s where I will end for now. Next, we will talk about intalling flooring, and outline the vision for our precious kitchen!
When we first bought this property only 4 buildings existed: 2 barns, a tool shed and a “shack”. The latter is our enduring name for what we now call Little House and home until our main build is done on the back half. This structure originally consisted of: a 750sq ft slab; a raised closet-sized “bathroom” (the ground caved in as you stepped into the “room” with a toilet and standing shower only); kitchen area with cabinets on cinderblocks and no placement for fridge or stovetop; a bedroom which barely fit a queen mattress, and an add-on enclosed porch with sagging retrofit air condition ducting. Complete with a magnetic-locking front door which only opened with a remote control.
The story behind this structure (as we only know from hear-say) is that the man who owned the property prior to the previous owners (this property has swapped hands about 4 times in the past 15 years) loved guns. Like a lot. And this building was used as his gun making hideaway-hence the heavy duty metal door…because metal doors fix everything and this building was clearly secure. But who knows what else this has been used for, it’s all pretty questionable at this point.
The building had some serious flooding issues because the laminate floor was covered in dirt and water stains, and you could see the watermarks covering the walls. The ceiling in the front half added on sloped down to about 6 ft tall, which matched the height of the “carport”. There was a smell that told us critters used the walls as their home. It just felt gross, and the 50 shades of brown didn’t help. The only plus is the massive windows that overlook our creek (those are staying).
So we decided it was best to start from scratch and gutted EVERYTHING. We took down all the interior walls, removed the current cabinets from their cinderblocks, took out light fixtures, and evacuated the bathroom plumbing in order to create a fresh, clean slate. We then hired plumbers to correctly install our plumbing into the concrete slab. (A valuable insight to have when DIYing: know when to call in the experts!)
Once the interior was gutted, it was time to build our new walls. Below you can see the original floorplan compared to the final designs. We removed the original interior walls and replaced them with new interior walls to create the new bathroom, two bedrooms, a laundry closet, and 2 storage closets.
Original Floor Plan (Dimensions not to scale or accurate)
Final Floor Plan Designed by our architecht Sarah Harper (H Designs)
In order to build the new interior walls, the ceiling had to be raised via car jacks because the ceiling rafters had begun to cave inwards. (I thought the whole house was going to collapse when my husband and father in law were doing this!) Then the three of us built up the new walls that would frame the bathroom.
Once the new interior walls were built and supporting the roof, we were able to demolish the front half of the house so that new exterior walls could be put up by our framers. These new walls would make the ceiling a consistent 8ft throughout the whole house.
Now that all the major demo is complete, we can now start the rebuilding process. Check back to see more!
Decoupaging is a simple way to add personality to any surface, and when I heard of a “cheaper” way to apply paper via glue I knew I had to test it out. Keep reading to see which method I found to work best for me and my Murphy Bed Shelving Back project!
You can find this and other DIY projects on my Instagram @theroostingplace.
de·cou·page /dāko͞oˈpäZH/the art of decorating surfaces by applying cutouts (as of paper) and then coating with usually several layers of finish (such as lacquer or varnish)
Merriam-webster dictionary
How to Decoupage
The process of decoupage is a fairly simple art:
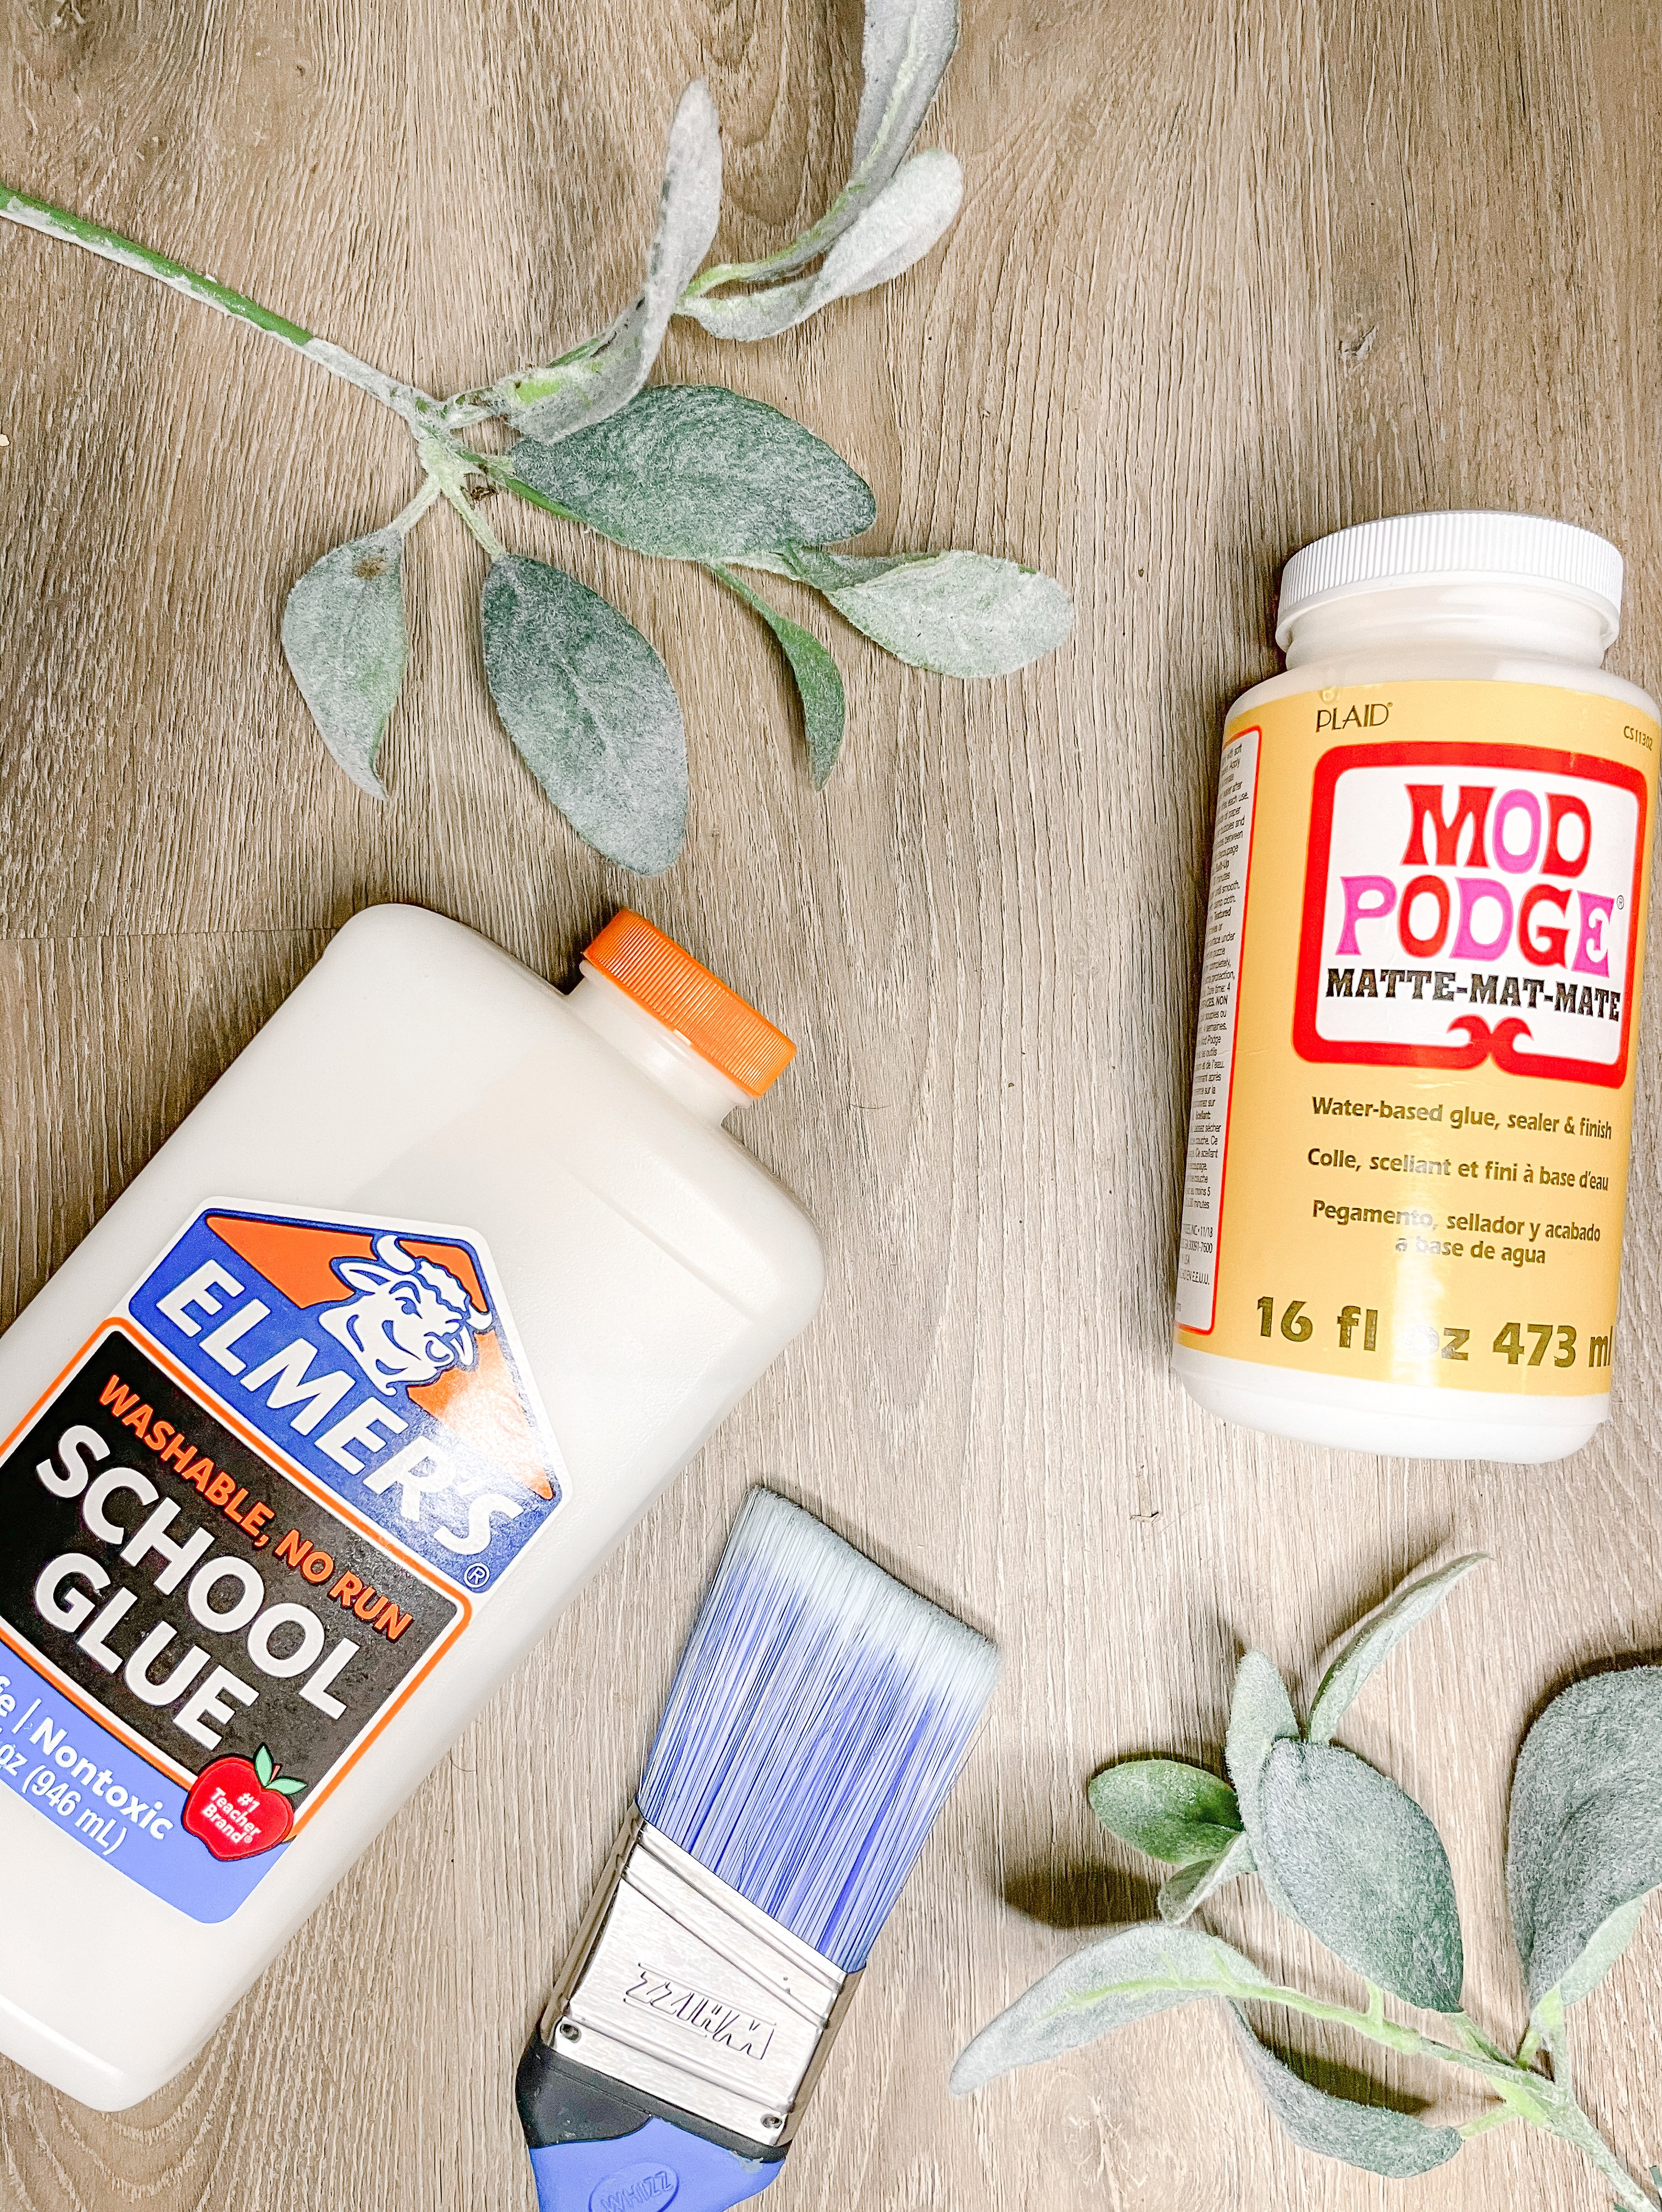
First, apply a layer of glue (typically Mod Podge) which can be slightly watered down for smoother application to the surface of desired project.
Then apply a layer of glue to the back of chosen paper.
Place paper on surface and smooth with hand carefully to avoid ripping the paper.
Coat exterior of paper with another layer of glue to seal and protect the applied paper from damage.
Mod Podge Vs. Elmer’s Glue
Mod Podge can be directly applied to paper with or without dilution via water, and is the more popular choice for decoupaging. The ingredients of Mod Podge are made up mainly of water and polyvinyl acetate, a common ingredient in most white glues. The main difference between this and other crafting glues is that Mod Podge goes an extra step beyone other glues and adds ingredients make this glue superior for glueing, sealing, and finishing—regular craft glues typically are only typically good for gluing.
But Modge Podge can get expensive, especailly when applying to a large surface area, so when I heard about the cheaper hack that uses a watered down Elmer’s Glue I knew I needed to try it.
According to a basic google search, the ratio to create “home made modge podge” from Elmer’s glue is 1/3 cup water for every 2/3 cups of Elmer’s glue. So I mixed some up and got to work to put it to the test
My Project
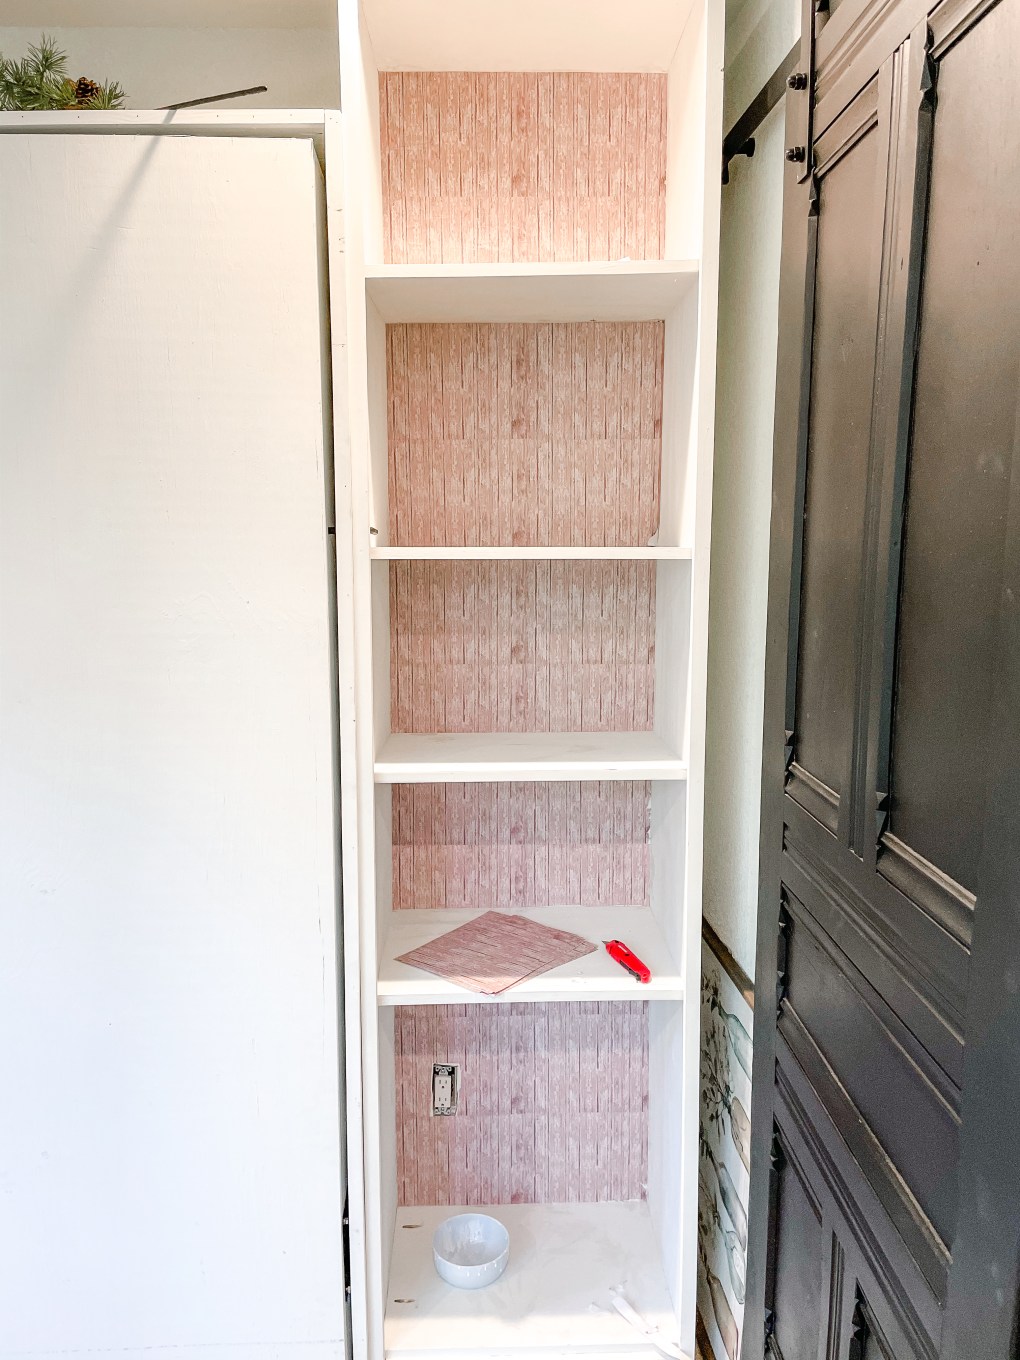
I decided to add paper to the back of my Murphy Bed shelves to give a fun contrast. (This was before I decided to paint them, but I love how the paper looks against my color choice). I used 12×12 sheets of scrapbooking paper, purchased from Hobby Lobby. I originally chose the more pink paper to the left, but after applying it I switched it out for the right. Not really relevant to this experiment, but notable nontheless.
Because I have two sets of shelving, Mod Podge was applied to the left, and the Elmer’s mixture was used to apply the right. I used the same technique as described above. After allowing both sides to fully dry, I was able to cut the excess paper with a box cuter knife to give relatively clean edges.
My Conclusion
I found the Elmers mixture a little frustrating to work with. It did not seem to stick as well, and left significantly more air bubbles between the surface of the shelf wall and my paper. Because this won’t get too much contact and wear, I think it will hold up alright, but definetly would have used the Mod Podge on both sides.
I think the Elmer’s mixture may work better with a less dilute ratio, and for me it did technically work, it just isn’t my favorite. The end result is still beautiful, and I love how easily this technique can transform a piece, but I guess I’ll be sticking with the real deal for now!
When we last left off with the Murphy Bed, I had teased with the rough concept drawing for my next plans: adding a design to the front. My plan was inspired off of a door I had seen on Pinterest, with angled wood pieces that had been laid in a “zig-zag” chevron pattern to create this fun, whimsical look and I knew I had to add this element into the Murphy bed. Keep reading to see how I did it!
You can also find this transformation and other real time DIY’s on my Instagram @theroostingplace.
Supplies
2 in. finishing nails
Approx. 20 8’x1″x2″ Primed MDF boards (chances are you will make a wrong cut or two, buy some extra because they can always be returned)
Spacers (I used nickels)
Nail Gun
Miter Saw
Speed Square
Basic, assembled Murphy Bed, prior to any “facelifts”
The Process
The seam you see in the middle of the bed front is a result of the 2 plywood sheets that were attatched to hold the mattress inside the box of the Murphy Bed, but for me, this looked very unfinished. This is when I came accross a beautiful chevron style barn door by Distinctive Doors and I knew I had to try my hand at a take on this design. Here’s how I turned the following concept drawing into reality:
First begin by drawing out a reference edge about 1″ in from the edge of the face piece of the bed. This will be where the angled cuts end, and leaves room to later add a boarder piece to give the edges a clean, finished look. Next, measure and drew a line about halfway up, which will be the point where top and bottom boards meet to create the triangle point and “switch directions”.
Next, begin to cut angle pieces. This process took some time, as I found it most full-proof to measure each board one piece at a time. Begin on the longest top edge sloping down to give the point of the center triangle. If using a Miter Saw, cutting pieces at a 45-degree angle is relatively simple-just set your saw to the 45 degree mark on the correct side depending on which cut you are making. If there is not a Miter saw on hand, use a speed square to mark 45-degrees and cut using a circular hand saw.
PAY ATTENTION to which direction the angle cut needs to go, depending on where the board is sitting when it hits the reference marks. I found it best to cut the board close to the needed length, then physically place the board in it’s spot on the face and mark using a speed square the exact location of the angle. I did this for top and bottom edges.
To add the next piece, use a spacer (I used a nickle but you can also buy tile spacers) to ensure even gap placement. This part gets tricky and helps to have another set of hands, because you need to hold the board in place with the spacer, as well as mark the angle cuts at the appropriate locations/lengths.
Once correct cuts are made, realign with the spacers. Then use a nail gun to attach the board in place. Repeat for all boards.
*NOTE: To make the cuts a the corners, first cut your 45-degree angle as you had been, then turn your saw to the other direction 45-degree angle to make the side cut. This will give you a 90-degree corner.*
Once the initial triangle has been attatched, attach the shorter corner pieces next. To do this, line up a 90-degree (straight) edge of a MDF board with the edge of the triangle, then mark your outer edge cut. This was the simplest way I found to do these angles and give the look I wanted.
Once all the diagonal cuts are in place, rip another MDF board into the desired width of the space between the edge of the boards and the bed front edge. Then attach with nails and viola, there you have it!
The End Result (and Lessons Learned)
Personally, I love how I was able to bring my vision to life and I hope y’all love it as much as I do! It did take some time due to the individual cuts required to minimalize wasted wood (trust me, I still made several bad cuts). Take your time, and if you are able, use a second set of hands. I ended up eye-balling my spacing at the end because my nickels kept rolling out, so my angles/spacing aren’t 100% perfect. BUT its very unoticable, especially after paint. I won’t lie, I feel pretty awesome knowing that I DID THIS with my own two hands!
But we aren’t done just yet! What’s up next: paint!
When we last talked about pools, we were talking about the basic design factors to take into consideration when designing a pool. The previous blog touched on basic pool sizes and costs, and listed factors that can drive that cost up or down (size, depth, shape, features…etc). If you haven’t read that, you can find it here.
Today, I want to hone in on the specifics of our personal pool design choices. This is strictly our opinion on certain features and does not rule that our decisions are best. Remember, when building ANYTHING, it is always about what works for YOU. What someone else has may look great, but if what you are designing isn’t tailored to your taste, space, and budget, you will never truly love it.
I aim to update this post as our pool designs become a reality, but for the time being, I have included our pool renderings designed by Pullium Pools to help visualize the direction we are wanting to head.
Pool Basics
Shape: Geometrical
We chose a geometrical, rectangular shape of our pool for a couple of reasons: I. this matches our house style best and II. this shape fits our overall yard most ideally. To be honest, I have never really been drawn to curvy pools and we are designing a modern transitional farmhouse that has clean, sharp, lines; white exterior; wood accents; and a black roof. For us, a curvy, rock-edged pool did not match the vision. Designing a rectangle pool also was vital if we wanted a pool cover.
Size: 34′ long X 15′ wide
This size was determined after measuring out how the pool would fit into our yard space. We have a “jutted” patio and wanted the pool shape to flow naturally with the lines of the house.
Depth:
At the deepest points, the pool will be 7′ deep, and slope up to a 3′ large shallow end. Orignially, we wanted to include a deep “diving” end and a large shallow “game play” area, but having both did not fit into our budget. After questioning and envisioning ourselves in the space, we decided that a “cannonball” zone was the best fit for our budget. As much as I would love to be able to have a diving pool, they are not cheap. This is because the total cost of a pool is calculated based on the perimeter. When adding in a diving end, there has to be a certain slope out of that diving end, so the deeper the pool, the longer the pool thus increasing the cost.
Becuase we chose to omit the diving area, we opened up our budget to enable us to include other features we considered a higher priority.
Spa/Hot tub:
Outside pool
6″ raisedsquare/rectangle
8 person comfortable capacity
Don’t worry-yes, there is a spa/hot tub! This design actually ended up giving us more trouble than the depth dilemma.
Originally, I wanted a flush entrance to the spa (I didn’t want to climb on top of stones to get into my spa). So we tried several design locations inside the pool perimeter but ultimately decided to place the spa slightly raised (6″) to the outside of the spa. Why? Pool cover. I’ll talk a little more about this in a couple sections down but the pool cover RULED our design choices. If we had the spa inside the pool, we would have had to roll it back to get to the spa when it was covered. This also was a factor if our spa (placed to the side) was flush- the pool cover wouldn’t be able to seal off the pool correctly.
Another reason we opted to raise the hot tub (barely, 6″ people) was to avoid cold water spillover into the hot water area. (Our designer told us we could have just put our least favorite couple on that side, which made me LOL, but we tend to like majority of the people we invite over). To compromise the raised spa (which will have a spillover) with the pool being flush and able to be covered, we have to include a “stepping stone” area or something similar to give our water a place to go. (See reference pic).
Fun Stuff: Features
Tanning Ledge: YEP
This was one of my top priorities when it came to the pool design. If you haven’t heard of one, these are extremely shallow areas/ledges (less than a foot deep) that usually have “bubble” fountains. These are PERFECT for babies and dogs to splash around and play in, and I love the idea of having low tanning chairs and sitting in the water reading my favorite book under an umbrella. Our tanning ledge will cover the end of the short end of pool adjacent to the spa, 15 feet long. This is perfect to space 4 chairs easily in the water.
Grotto: NAH
We chose not to include a grotto. Personally, I consider them a little too loud and every single one I have been under has some form of bug as a primary inhabitant. They also tend to build up some ick and are hard to clean. For us, this wasn’t something we wanted.
Fire: YOU BET
While we don’t have exact locations for this yet, fire bowls/fire pits are a must for our entertaining space. We love the ambiance a fire gives off, and both had this at the top of our “wants” list.
Pool Cover: Automatic
Adding in a pool cover will eat away any budget, but an auto pool cover adds a considerable amount. As I mentioned before, having this feature kinda ruled our design choices. This was a priority for several reasons the top ones being: we have tons of trees around the house, and we are open to adopting or fostering in the future. When taking in a child in the system, agencies are extremely strict regarding pool safety. You either have a pool cover on at all times when not in use, or you put up a pool fence.
I don’t want the eyesore of a pool fence, and we did not want to have to deal with the hassle of taking the cover on and off ourselves/ paying to hire someone to do this so an automatic cover was our best choice. These are most managable price wise when they are installed in a rectangular pool, and like I mentioned before, installing stepping stones to make up for the height difference in the spa/pool.
Slide/Diving Board: NAH
We chose not to include either of these as built in options. For us, we don’t have a diving end, and slides are wonderful for children until they grow out of them. We will probably compensate for this later by buying an inflatable/temporary slide that can be set up and taken down when not in use.
Pool House: MAYBE
This was another last-minute addition to our plans that altered our budget, which is still under debate depending on how our loan plays out at the end. Our options are either to put the pool equipment behind the master bedroom, in a pool house, or make a faux wall of sorts to hide the equiptment. As of right now, we are leaning towards a cheap fencing of sorts to hide the equiptment, and build a pool house sometime in the future.
So yes, that is the majority of our pool choices as of this moment. I hope to add in better photos once our rendering is complete. I highly recommend working with a designer at a reputable pool company. Their job is to help you nail down what will work best for you and your space (we spent almost 2 hours doing this, and we thought we had most of it figured out beforehand!) Don’t rush the process, and remember you are allowed to change your mind! This is your investment, and you are the one that has to live with the design, not anyone else! Do what works for you.
Okay y’all, this may be the simplest yet most satisfying project I have done yet! We have given this little house so many additions to make our space functional, yet visually appealing and I have been dying to put these shelves up in our bathroom. This house definetly has challeneged us to simplify and cut back on unneccecary items, yet condensing our bathroom was continually a struggle. We needed something that was pretty, and functional to hide all of our toiletries, hair products, medicines, towels, etc… all in a 2.5X 5 ft space above the toilet. What we had previously definitely was not working in our favor.
Cue our bathroom shelves. I say these were one of the easiest projects to date, mainly because the hardest part was waiting for the stain on our wood to dry so I could put it all together! It’s very rare that I finish a project in one day but these I finished in about 2 hours not including stain dry time-and I only bought the brackets for the assembly of this project, everything else I used I had on hand! WINS all over the place!
I first started off with these L brackets from Hobby Lobby, which at the time were 50% off. I ordered 2 for each shelf, a total of 8. Hanging these guys was super simple-I measured the center of the space above the toilet, then measured 6 inches out to find the where each bracket would sit. Next, I placed my right bracket up against my edge reference point and used a pencil to mark where the screwholes were. Taking a drill bit, I then made a pilot hole for my drywall screws since these would not be in studs. After inserting the anchor, I replaced the bracket and secured it using screws. I used a level to find the placement for the left bracket, and repeated the steps used for the right. I measured 16 inches down for the next shelves and repeated until all 8 brackets were securely in place.
Once the shelving brackets were in place, it was time for the stain. I reused some wood we had laying around in the barn, which measured approx. 1/2 thick and 11 1/2 wide. This would leave a slight gap in the back of the shelves but since this saved me from having to go buy more wood I wasn’t converned-and in the end it doesn’t even show. Retrospectively I would have stained the wood first to save on drying time, but se la vie.
After cutting my wood piece down to 18 inches long, I sanded with 220 grit to give a smooth, refreshed surface for my stain to adhere to. Next, I applied Minwax Pre-Stain (think of this as conditioner for your hair, this step preps the hair and gives a smooth surface for the next product to adhere to evenly). Minwax Early American as my stain color of choice, and since I used scrap wood this was a gamble if it would match the other wood accents in my bathroom. Because stain looks different on every single different type of wood, I typically would test my stain colors but I didn’t have any spare pieces to test. Thankfully this ended up matching close enough for me.
After the stain dried, it was time to assemble and decorate the shelves! I attached the wood to the L brackets with what I calle “baby screws” or #8 wood screws, and there yout have it! Easy, beautiful, functional storage that transformed our bathroom! Do you love them as much as I do? Because after I finished decorating these I could not stop staring! I will link all the bathroom decor on my shop page here!
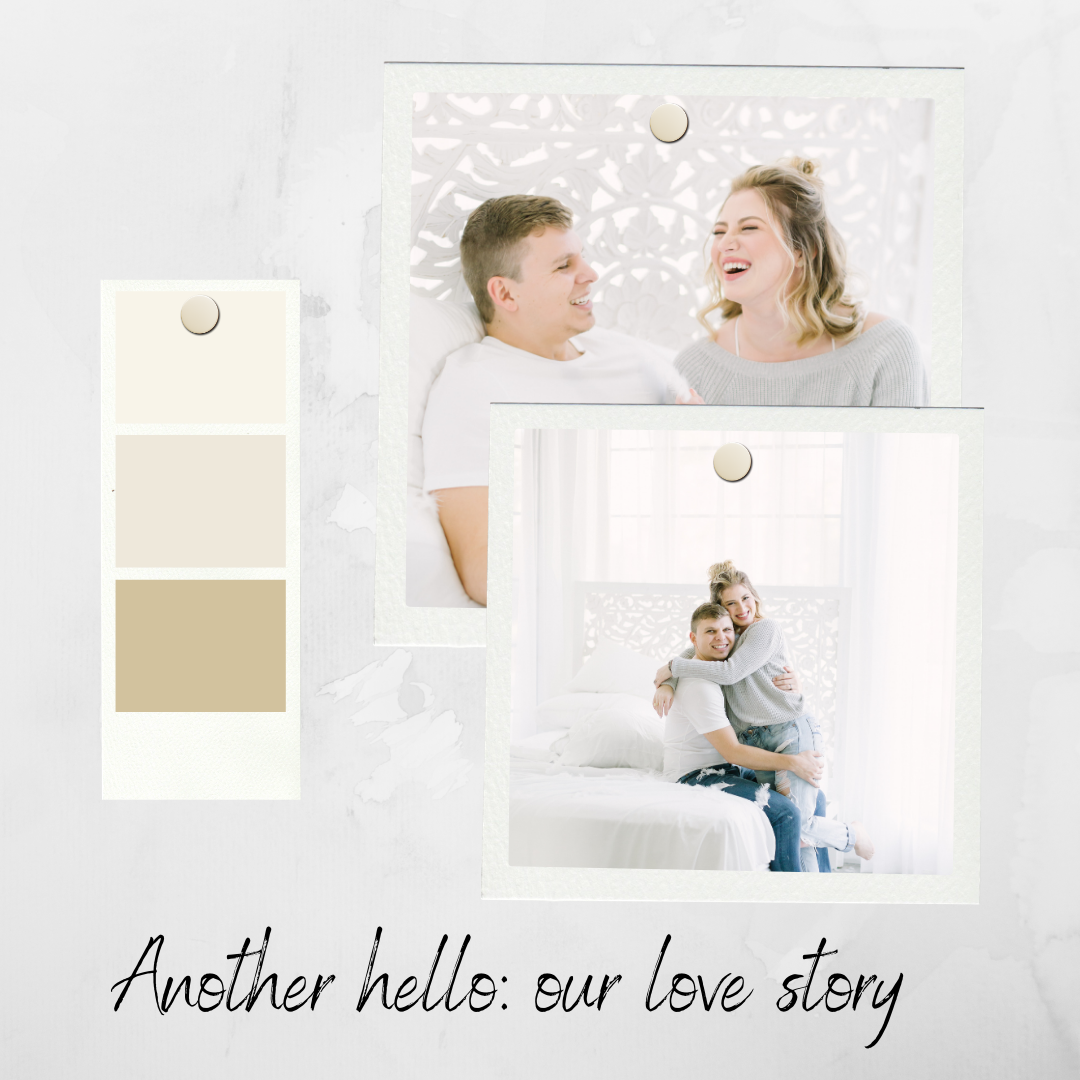
If you are just now joining us, please go read Another hello: our love story pt. I to catch up on all the deets of our beginning.
…Continuing on…
Harley in 2014, that smile still gets to me.
We started to make our little “dates” a regular thing-not advisable. I was sneaking out late at night, staying up late talking-WE WERE JUST TALKING- in his backyard, and I distinctly remember my chemistry grade was slipping because I was falling asleep in first period. (Still a goody two shoes this wasn’t normal). I should have known our “perfect”, secret relationship would come crumbling down eventually, but I had no idea it would have turned up how it did. One night, we fell asleep, and I gave my mother a panic attack when I wasn’t home the next morning. She had no clue what I had been up to, and she was not happy. Let me tell y’all when momma ain’t happy, it ain’t pretty andI’m just happy I walked out of that house alive that day after the tongue lashing she gave me.
Needless to say, I was grounded. For life or longer. And my mom threatened to have Harley arrested…because that’s what rational people do in these circumstances (she never did, no worries). She went to the church, and our youth pastor decided to remove Harley from the youth (jokes though the church was so small there was no college program so he basically was being removed from the church). This was weird for me. My faith was challenged, I was confused and angry at every single person I loved. I became bitter, and for me, I also stopped attending church (we can talk about that journey more later too).
Senior prom
While I was pulling away from everyone, including my faith in Christ, thankfully Harley was drawing closer. He found another church and stuck through my tornado of navigating my mother’s wrath. He is patient, he is kind, he is steadfast. By being apart, we were able to strengthen our relationship, and he encouraged me to seek Christ still, even though I felt numb to the idea. Looking back, I just thought I loved him then. If only I would have known the love we are capable of today because of what we have endured.
Needless to say, we survived the rocky start of our relationship. My mom eventually forgave him and allowed me to go on (chaperoned) dates. We went to homecoming football games and my senior prom (well kind of, our school had a weird rule about being over the age of 21 and attending prom-should have had him sign up to chaperone or something…), and our friend group became family. There are so many memories I have of those late high school years, and Harley is there for every good one.
Harley withstood rude comments to fight for me, and for the future he knew God had curated for us. Most importantly, he continued to stand by my side through many of life’s difficulties big and small: the death of my dad as a junior in high school, losing my spot on my high school sports team where I had played for 3 years, losing friends, gaining friends, the learning curves of inheritance responsibilties, and the hard first years of being a Fighting Texas Aggie biochemistry student. He continued to be there, even when I was crazy and tried to break up with him because of my own insecurities. He stayed and continues to fight for our relationship, even to this day.
Now that I’m in tears because writing this reminds me how much I love him, I’m going to stop here. I hope you enjoy all the grainy, poor quality photos that come with the mid 2000’s era.
Hello, and welcome to my first blog post regarding some of our building journey! We have decided to go ahead and include our pool in our preliminary building budget for two reasons:
We only want to do one lump loan with everything building-related included.
Building the pool at the beginning of the build process cuts down on messes to clean up later. By building the pool in the preliminary building phase, we don’t have to worry about concrete trucks tearing up our driveway, landscaping, or any sprinkler systems we decide to put in place. I will put a disclaimer that thet pool company will not/cannot start on your pool until the exterior walls of a house are present. This was odd to me, but it has to do with city codes.
Obviously, including a pool into a new build budget isn’t in the cards for everyone, but I wanted to give a breakdown of what the process (and cost) of building a pool is in general. We are opting to put in a gunite pool, so I can only speak to numbers that we have been told based on this type of pool. I can write another blog post on why we chose gunite over vinyl lined later, but for now let’s talk budgeting.
Pool cost depends on a variety of variables, and each individual choice drives the total cost up or down.
Pool cost depends on a variety of variables, and each individual choice drives the cost up or down. Sadly, this is the answer you get to a lot of those “but how much does this cost” questions when it comes to designing or building ANYTHING, and a pool is no different. But I want to share some things to consider when designing your own pool based on the conversations we have had with professionals in order to nail down your ideal budget.
Hold on tight, we are about to talk some pretty hefty numbers. We were told that a standard, 22 foot long, retangle pool with no additional add ons prices start at $60,000. To add on a basic spa (hot tub), prices start at $15,000. This puts a small, basic pool project starting at $75,000. Pool cost is calculated based on the perimeter of the pool, so any abnormal shapes can easily make the cost increase.
So now that we have all that stuff out of the way, lets talk about how you can decide what kind of pool is best for you, your family, and your budget. For us, we oringinally wanted it all! Who doesn’t? Pinterest is a black hole where dreams live and reality is a facade that doesn’t exist. However, out in the real world, there is real money that (typically) has to be borrowed/paid back. And our “Pinterest Pool” was going to cost us at LEAST $150,000... hahahaha no thank you…
So how do you navigate what you really need in your pool? First, we wrote out a wants list of everything we wanted- even the crazy things. For us, we really thought we wanted a rectangle heated pool with a deep diving section, large shallow area for entertaining,tanning ledge, and spa; along with some other fun details like fire features. (Like I said, we wanted it ALL). So how to narrow it down?
We started to imagine using this pool and asked ourselves these questions:
What do we see ourselves doing in this space in 5 years?
What do we see our future (or current if that applies) children doing in this space in 5 years?
Do we entertain often?
If yes, how many people?
Are our guests athletic/enoy water games like volleyball or basketball?
What style fits our home?
Modern? (i think of these as geometrical, clean lined pools)
Traditional? (i think of these as curvy, rock pools)
What do we have space for?
Are we adding landscaping aroud the pool?
Do we need to leave space for additional entertaining/play areas?
Once you have asked yourself these preliminary questions, stand in your space and mark out how big your “ideal” pool would be!
I’m such a visual person and measurements have 0 meaning in my mind if I can’t see it in person. Seeing what you have space for is a great way of getting a size idea down, and doesn’t leave you asking your pool designer “ughh how big is that?” during your meetings. You can always adjust the size if the price point isn’t right, but thise gives you and idea to go off of.
After we had done both these things, it was time to start whittling down our list. We seperately picked out our top 3 features we felt were important to us, and reconviened to compare. Thankfully, we weren’t too far off. What stumped us the most was the desire for a large shallow end or for a diving area, because we needed to make a choice since our budget wasn’t going to allow for both.
Ultimately, we decided on vetoing the diving end and replacing it with what our designer calls “the cannonball zone”. Basically, we have plenty of room for a shallow volleyball area before the grade of the pool will slope down to 6-7 ft (undecided yet, the deeper we go, the longer the pool and the higher the price).
We also decided to veto the deep end so that we could splurge on a automatic pool cover. This is a non-negotiable factor in our design because of the safety a cover offers (vital if we ever choose to foster/adopt in the future). These pool covers start around $15,000, so we did not have the room in our budget to have everything. I will cover more of our thought process on decisions we made in a later post, so stay tuned for those!
Ultimately, it comes down to what you will utilize the most for it’s cost. If it stretches your budget to the limit, will you really enjoy it? Choose what works for you, and your budget to get the most out of your pool!