There are so many repurposed treasures in this space: the wood wall (made from an old fence on the property); the brick pavers that I found on Facebook Marketplace (which I stained to become the pink floor of my dreams); the estate sale lockers/birdcage (that I paired with another Facebook find to create into a fairytale chandelier); the doors that were found inside a barn that was on the property…
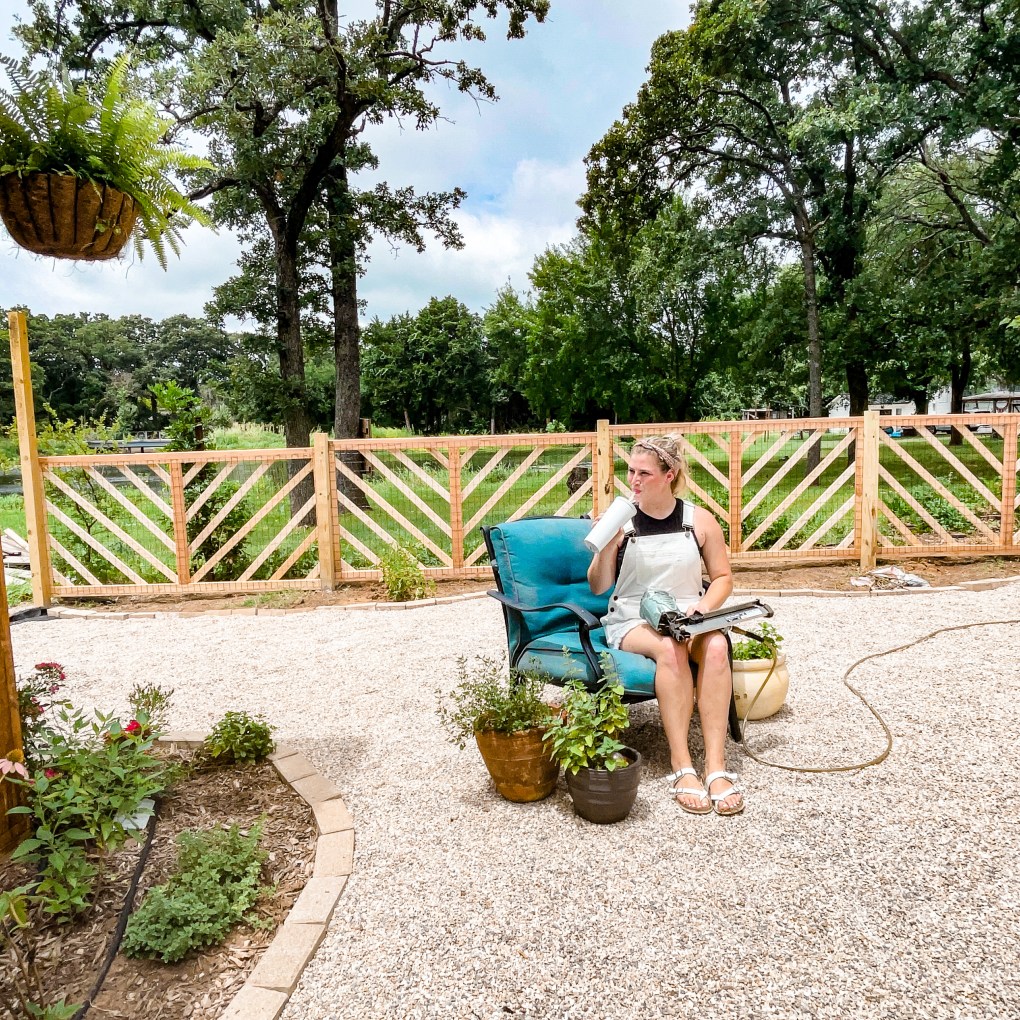
My sweet friend Emily at EMphotography captured some beautiful photos of our in-progress greenhouse that brought me to tears. I wasn’t able to capture the true tones of these pavers with my good ‘ol iPhone and Emily came in and blew me away with the gems she captured.
We have so many more things to do until the greenhouse can be dubbed complete, but these are the moments we work so hard for. These are the details that make my heart sing. This is what makes me happy.
Brick pavers are precious to me. I love the aged feel they give to a space and how connected to history I feel when I walk down a row of them. So much that before I began building the greenhouse when I found a few pallets of gray concrete pavers on Facebook Marketplace for a steal of a price I knew I needed to buy them. And until now they have been sitting in a pile collecting leaves and dirt, minus the few here and there that I pulled for garden bed edging.
Now they have a forever home right here in my greenhouse. But they didn’t get this far without a little TLC. And the process made so many people (including myself) doubt and question everything the moment I started staining the pavers pink. But there are no regrets.
Photo: EMphotography
“There is no perfection, only beautiful versions of brokenness.”
-Shannon L. Alder
Here’s how I did it.
Materials:
Cushion sand
concrete pavers
Valspar Concrete Stain (solid) in Red Sandstone and Garnet
White (S) Mortar
Hydrated Lime
First, begin by leveling your cushion sand. To me, this is one of the most difficult parts and I did not do it perfectly (I’m totally okay with that). We used a laser level to run string line grids and then leveled the sand to the same-ish height from the string line.
Lay your brick pavers in whatever pattern you choose. I did a 2×2 “woven” pattern. I used extra sand to level individual bricks as I laid each one. You will want to wear some form of gloves or you can kiss your fingertips goodbye.
Once your pavers are laid, here is where you start staining. I used my two colors to mix a middle shade for variation, but you can do as little or as many colors as your heart desires. I found that using a paint roller is quicker, but you will still have to go in and touch up edges/add your variation colors by hand brushing.
When your stain is dry and you are satisfied with the color placement, simply pour your mortar on top of the pavers and use a broom to push the dry mortar into the spaces between your pavers. Lightly add water after you have swept the mortar into the cracks and use your broom to push the “sludge” into the cracks. Here, if you want a clean brick look, take a sponge and clean each individual brick. If you want a messy mortar look, leave it alone to dry.
Add another layer of mortar in the same method as before if needed to fill any extra gaps.
Once your mortar is dry, use a brush or large broom to scrub your bricks and rinse off the excess mortar remnants.
You may choose to leave your bricks as is, or if you want a more delicate look, you can apply a limewash treatment. Limewashing will give your bricks a “chalky” finish. I did not use limewash paint on my bricks, but a traditional wash composed of 15-20% hydrated lime to 80% water ratio to make a slurry that was then rolled over my bricks and allowed to dry. Becasue lime is a mineral (calcium hydroxide) the limewash will flake off in time and will need to be reapplied if a sealant is not put on top. I chose to not apply a sealant as I want my brick look to “weather” over time.
Right after application of the wash
Apply in thin coats, and let it fully dry in between to see how light it gets. If it is too dark you can always scrub or power-wash the excess off.
Limewash mid dryingLimewash 1 day dryLimewash completely dry (Photo: EMphotography)
So what did this cost?
Overall, the total project (160 sq ft) cost me:
Cushion sand (1 yard) $20
Valspar Solid Concrete Stain (2 gal)-$50
Concrete pavers (facebook find)-$100
Mortar (3-50 pound bags)- $35
Hydrate Lime (80lb bag) $12
Misc brushes and tools-$30
Total: approx. $247
Finding the pavers on Facebook Marketplace was a huge cost saver here, and I have so many leftover from buying several pallets (used for garden bed edging). But if you cannot find any on Facebook, concrete pavers typically run about $0.60 per brick ad are about 4″x8″ in size. To buy pre-colored red ones, you are looking at about $0.75 per brick (buying them pre colored takes away from customizing your color).
You can use this calculator to help determine the number of bricks you will need for your specific project size!
Photo: EMphotographyphoto: EMphotographyThe bricks will turn more true tone when water is applied, but then dry white again. Photo: EMphotography
My greenhouse is now ready for all those final touches (filling missing window panes, potting benches, lighting, shelving..etc) and I’m so excited to watch the full character of this greenhouse come to life! But most importantly… PLANTS! Spring is in the air and aI cannot wait to fill this space with all my little plant babies.
What a year. This year brought many hardships, challenges, lessons, and growth. This year brought joy and memories. This year brought so much love and respect for learning.
This year we learned we can do really hard things: and I’m not only talking about the projects we tackle. We learned that people come and go and that nothing is promised. But through the hardships, we found Home. By pouring myself into our home and the process of creating this beautiful life I have seen that life does not have to “go” a certain way for you to be content. You are not accountable to anyone’s expectations but your own, and no one can belittle your talents or the light you bring into the world. We are different, and we should celebrate that.
As I return to each project we completed this year, you may just see photographs and smiles. But behind each photo is a memory, is a lesson, is a triumph. I also love being able to look back and see how much I’ve grown in my craft- not only as a DIY-er, but through my documentation of these moments. I have found a creative outlet that I will be molding and perfecting for the rest of my life. So, let’s go back, shall we?
Murphy Bed
We started on the Murphy Bed in January of 2021 and though it was completed in pieces over the first few months, this is one of our most functional projects to date.
To read all the blog posts regarding the Murphy Bed click the links below:
Ahh, the infamous chicken coop! Another big project and definitely our most recognizable project of the year.
We learned a lot during the months we built the coop and put a lot more effort into the details and build than most would expect, therefore it took a good amount of time to complete. Due to the reduced daylight hours of winter, and my husband’s work schedule we were limited in the first couple of months to working on the weekends until it reached a point where I could work on my own. We purchased and modified our plans from Sarah at Twelve on Main, and I could not dream of trying to replicate those plans for my own benefit.
We have several more updates and additions planned, but until then, I will stare in amazement at the beautiful thing we built.
You can read/see more about our Chicken Coop in the posts linked below:
So much was done on the garden this year. In addition to the chicken coop, the whole garden area was established and built up! I wanted a garden that was functional, yet beautiful since I spend so much of my time out here. While there are several more projects in mind for this space, I am pleased with how far it has come in such a short time.
Click the link(s) below to find out more about each garden improvement.
Processed with Focos
Ground Cover: there were a LOT of crushed limestone rocks shoveled during the Texas summer heat.
We started the greenhouse (to be completed in 2022). You can see more of the incomplete greenhouse decorated for Christmas HERE.
The Workshop
In addition to the garden projects, our workshop got a complete makeover! We needed a place to call home for all of our tools, especially since we would be down in our little house for another year due to building setbacks.
Click the following links to find out more about this project:
I also updated our master bedroom with this beautiful peel and stick wallpaper from Wallblush.com (use ROOSTING15 for 15% off)
We Started Building Big House
Last but certainly not least, we received the permits to build our forever home. This was a ten-month-long process that really dampened our spirits ( you can read more about that process HERE) and put us almost a year behind on building. But God’s timing is the best timing, and we are even more grateful for the opportunity to continue building up this place we call home.
Keep an eye out for my Mood and Design Boards to see more of what we have planned for Big House. (as of this point we have completed our basement and are prepping to pour the remaining foundation!)
It certainly has been a BIG year for us here at the Roost, and it can only get better. We have been blessed beyond measure and challenged in some of the most difficult of ways, but we have only come out stronger. I cannot wait to see what this year has in store for us.
“Cozy, comforting, connected”. That’s how I envision my dream bathroom. We have lived in our share of homes and visited our share of bathrooms, and the ones I fall in love with are the ones where I feel like I can truly breathe and relax ( of course also the ones with a large soaking tub). Personally, I don’t like a ton of bright whites or cold marble tones, not in my bathroom. I understand the draw to white bathrooms, I really do. They can feel clean and happy. But for me, I need my bathroom to be a true reflection of nature, with wood tones, warm stone, and earthy elements; so if that is you too, welcome.
I am inspired by dramatic metals paired with wood graining. Something about a sauna enclosed with wood makes my heart happy, and I wanted to incorporate that feeling into our home.
Our bathroom is composed of several “sections”: vanities, wet room, and toilet closet (in addition to my personal vanity that is not included in these design boards). There are several directions this space could head, depending on how the room feels once we have reached that stage in construction.
But for now, let us explore the possibilities, together.
As always, you can see more updates on my Instagram: @theroostingplace
Vanity
I was hesitant about the window between the vanities at first, but it has grown on me as this will allow for natural light to filter in through our shade, reducing the need to turn on the overhead lighting. I love how wood planking and beams will draw the eye upwards and give a natural feel to the space. It then comes down to design elements.
I am breaking up these designs into Option 1: light flooring, and Option 2: dark flooring. I am attracted to both ideas, but it will ultimately depend on the space.
Option 1: Light Flooring
1.a dramatic dark vanities and a lighter moody green wall1.b brighter tones and natural wood vanities1.c natural vanities with a moody green wall
Option 2: Dark Flooring
2.a bright wall2.b moody green wall
As you can see, each option can be turned in different directions, all being beautiful in their own unique way.
Wet Room
“A wet room is a fully water-tight bathroom with no separate shower tray. The “walk-in” shower area is usually level with the surrounding floor but with a slight slope to the drain which is fitted directly into the floor…a wet room typically contains a shower and a tub.”
Our wetroom will be equipped with a steam shower, two shower heads, and a soaking bathtub. The back wall behind the tub will be an antique tile and accented by a chandelier (most likely a candle holder to avoid any electricity risks of a steam room, and honestly the idea of a candle-lit soak makes me giddy).
The design of this space also depends on our flooring choice, as we will incorporate the same tile into the wetroom.
I personally love both looks alongside the brass details.
Toilet Closet
Just your average toilet closet, but make it fancy. I’ve included boards that showcase both flooring options.
I am extremely excited to work on bringing this relaxing space to life, and can only hope that this is a space of true relaxation for decades to come.
What’s your favorite: dark or light flooring?
Talk soon and God Bless.
xx, Lanna
p.s. (If you see something you like and would like more information on any items/elements in these boards, you can purchase my link sheets below:
Relaxing Natural Bathroom: Dark Tile Floor Edition
These link sheets are complete with active links to all elements and design suggestions in the images above for you to peruse and buy at your own pace! Happy Shopping!
Unfortunately, I do not come from a family with heartfelt timeless recipes, but I LOVE food- The prettier it appears on my plate, the more my taste buds become prepared for the flavor that’s about to follow. And that is where my love for the internet comes in. There are so many talented food bloggers out there! In years past, I would spend hours searching for the perfect recipes to compliment my Christmas dinner table. However, I am not hosting this year, so I wanted to share some recipes that I have had on my mind because I have fallen in love with them for both their flavor and their appearance.
I hope they make you smile and your stomach growl, as well as help ease any last-minute kitchen stress you may find yourself in this year.
My favorite part!) Seeing (and smelling) desserts always have my mouth-watering, and I’m so sorry if they’re all you can think about for the rest of the week!
Now you know what I’ll be making in my the kitchen all week! Can you say YUM? Many of these recipes are tried and true and absolutely to die for! There are a couple of new ones that I am excited to try out this week and I will tell you all about it on my Instagram: @lndavis18
Nothing like food to get you in the holiday spirit! Again, best wishes to you and your family during this time.
I have to admit, I ventured into…a mall this week. I know, sounds crazy, especially during the peak season. But I haven’t stepped foot in a mall in over a year and I needed a dress for our three-year wedding anniversary photos, so we went. And I found some great things that I adore plus a couple of other cool finds for the week that I have to show off.
When it comes to design, I am a visual person. I thrive off of being physically in a space, taking in the potential based on how the room –feels– and where it wants to head. I know, that may sound crazy-it’s just a room, right? Well, I see it differently, your home is so much more than just a collection of rooms. It’s a feeling.
Of course, life does not always allow us to physically be in the space we are creating. Prime example: our new home build. Because of delays and shortages, I am needing to design and choose elements for our home way before we even step foot on a solid foundation. This is where my love for the internet and its resources comes in. While I’ve utilized Canva for virtually designing client spaces, I didn’t really understand its potential for my own home designs until recently. I kept thinking I needed a physical space. But on the contrary, by creating design boards for each space in our home, I am more excited than ever to bring the visions to life.
That being said, I am excited to embark on the new endeavor of sharing my design boards for each space in our new build with you all! Our home is being furnished completely from scratch, give or take a few pieces that will be moved out of storage. You see, in our last home, I was still learning how to create my own style, and then how to meld a style into the space we were in. We also had a ton of hand-me-down items that I didn’t personally choose (which was great given it was our first home).
Several of the furniture pieces are now in the Little House, and will stay here when we move out. So now we get to start completely over!
Main Bedroom:
Mood: Cozy contemporary with vintage feeling pieces, texture, and warm tones to combat beautiful modern build features. I want my bedroom to make me feel cozy and safe, surrounded by soft texture, pretty light, and natural comfort. We will be implementing several of these elements throughout our entire home, but most importantly the bedroom.
Back to design boards: the possibilities are endless, and taking screenshots and compiling all the goods in one place really helps bring the vision of a space to life-all without having to commit to a piece to see how it all will look together! I never consider these concrete, more fluid suggestions to spark creativity and help set realistic cost expectations.
To purchase a downloadable link sheet with all the items displayed above: please click below:
Cozy Contemporary Bedroom
Doesn’t this bedroom just make you want to crawl in bed and stay all day? Purchase to access a downloadable document with an interactive link sheet with items on display.
Another reason we are starting over is the size of our new house. We don’t call it Big House lightly-its huge. And none of our old furniture would “fit”. So we sold most of it and are starting fresh! This is super fun, and a little nerve-wracking sheerly because of what things cost-but that is why we budget, plan, and buy throughout the months leading up to move-in day! I’m super excited to be able to share this sneak-peak into our home with you all, and to be able to share links to some crazy cool finds!
I also virtually design for you! If you are interested in a virtual styling consultation, please reach out here or send me a DM on my Instagram: @theroostingplace. This process is super fun and convenient for those who want to start transforming your home but don’t know where to start-on your own time and budget. I will create boards like above for you based on your style, and send link sheets for you to order off of at your pace! Those I’ve worked with so far have loved the flexibility of this kind of option, and I look forward to chatting with you about your dream home.
No, the greenhouse isn’t done, and my to-do list is so long it is rolling out the door and down the driveway. But I decorated anyways.
Sometimes we need to give ourselves permission to do things that make no logical sense to anyone else and take care of ourselves physically, mentally, emotionally. Taking a pause and decorating the (incomplete) greenhouse checked off all those areas for me by giving my body a break (to be honest it’s been asking for one), my creativity was able to flow freely, and I was brought joy by plugging in those sparkling lights. Take care of yourself during this season, you need it.
This little corner has me excited about the possibilities for next year. To look back and see how far we have come and to watch the progress. But, all in its’ own time-we’ll get there. For now, we enjoy the now.
I knew this was going to be a temporary and short-lived endeavor since I’ll have to keep working on the greenhouse, so I focused on natural elements while incorporating some alternating textures like burlap and ribbon.
I also could help but incorporate my newest, and most comfy, lounging outlet: a hammock chair! Again, pulling natural elements this chair is the perfect addition. Along with my legumes canvas art for some added texture (when in doubt-add texture!)
“Expectations were like fine pottery. The harder you held them, the more likely they were to crack.”
When we renovated this little house, I knew I wanted black windows. However, when we were ordering our windows, black ones were back-ordered by several months, so we installed the white windows and put it on my “list” to paint them black later. It has been over a year since we moved into this little home, and I finally made the time to paint my windows black using Rustoleum Semi-Gloss Black Enamel Spray paint and Scotch 33+ Pro Electrical Tape for the grids.
I am in love and cannot believe it took me this long to make this change. The black windows now burst off the walls and beautifully frame out the views of the outdoors. My heart sings when I look at them. I highly recommend this simple, and quick DIY if you are wanting a change.
Tips and Tricks:
Taping/tarping off will take more time than the actual painting does, but it is so important. I highly recommend using Frog Tape Multisurface painter’s tape to get the best edges. In my opinion, it is worth the extra couple of dollars per roll to have a crisp edge.
Clean your windows well with a de-greasing cleaner. I did not fully clean my windows and the paint did not stick as smoothly in some areas. It is not noticeable from far away, but it is “bumpy” in some spots.
If you do not want to see any original white window mullions (mine are in-between the glass) double your tape lines (make the mullions appear thicker).
Fully allow your windows to dry, then open them to spray the lip that is covered when closed to get full coverage. While this hack is amazing, you will not be able to get into every nook and cranny-If you want completely black windows, I’d budget to buy new ones.
Electrical tape is water and heat-proof: this trick will hold up over time and you can also use this on exterior sides of windows, which I plan on doing at a later time and will give more details once I do.
Hemming Tape: I will be the first to admit do not have sewing skills, so instead I use hemming tape to shorten all my curtains to float above the ground. I also cannot believe it took me a year to finally get my excess curtain material off the floor!
Kitchen Cabinet Color: Herb Bouquet By Benjamin Moore
It is time to finally talk about the design elements of “Big House” and what inspired our choices. I am going to try to give some credit where credit is due, but I cannot always find the sources of inspiration, and to those to whom these photos belong, I apologize.
To find more updates regarding our home build, find me on Instagram: @theroostingplace
The exterior of a home is the first impression. This is the first space the eye sees when entering a home for the first time, and I wanted to be left in awe every time I drove up to our home. I love crisp lines of modern black windows and sleek white exterior tones. I love the warmth old world stone and how that earthy material connects us to the past while we create our future. This mixture of metal and stone could not be complete without wood elements, so naturally, we are incorporating lovely wooden headers and beams.
I hope to reflect the feeling of warmth and comfort when guests enter our home, and I hope that for now, that feeling radiates to you as well through the photos that inspired us.
To see what material we used for our exterior cladding click HERE.
From left to right sources: unknown, Sterling Roses Blog, unknown, Style by Emily Henderson, Studio McGee, AllSortsOf.com, Luxesource.com, unknown, Linda MacArthur Architect
Mock-Ups: by Harper Design Projects
To see what material we ended up using for our exterior cladding click HERE.